Do you go through phases where everyone seems to want one kind of treatment?
For me, recently, its been the full arch immediate loading treatment – commonly referred to as All on 4 (a Nobel Biocare name, their implants have the most research in the subject!)
Now, every treatment can have complications – its the nature of dentistry. I am going to show you a fairly rare complication, and I’m not even sure how it happened.
I did the surgery for the case almost a year ago, and about 3 months ago, when we were ready to take an impression for the final bridge, one of the lower implants just rotated out in my hand!
My patient had said that there was a niggling symptom from this implant, but we had always felt it to have integrated, I had torqued down the abutments previously and everything seemed normal.
Just for reference, it was the lower left implant, and it was angled distally to avoid the mental nerve.
What could have caused this?
Oral hygiene was not an issue here – the patient was keeping everything immaculate and clean. The brown staining that you see is from Corsodyl mouthwash which he is incorporating into the water reservoir in his waterjet.
Occlusion could have played a part, he is a SK3 base, and the occlusion was heavier on the right than the left. Maybe this could have pulled the left side up when biting? Its a long shot, but may have contributed.
Shape of the abutment?
Sub-optimal fit? (a posh way of saying that the provisional bridge didn’t fit the implants!
Shape of the abutment
This case was treated using the Bredent implant system that I have used for many cases in the past.
One feature of this system is that the prosthetic components are “Chunky.”
This is good because it can give them strength and it does make them easy to work with.
The problem is that it is possible that when you place the implant, especially an angled abutment, it is easy to think you have a perfect abutment fit, when in fact, its engaged to the bone.

Another possibility is that the difference in bone quality between the cortical and trebecular bone could be causing a micro-rotation of this implant.
I know the insertion torque was a little lower than I would like for this implant (about 25ncm), but the others were between 35-60ncm. I generally like to have the average above 40ncm for this kind of treatment.

My guess is that a sub-optimal fit was the main cause, and this might have caused movement in the implant shown.
The reason for thinking this is that once the LL4 implant was removed, there was a slight noticeable movement in the bridge when it was seated on the remaining 3 abutments. The abutments were tight, so it couldn’t be anything else.
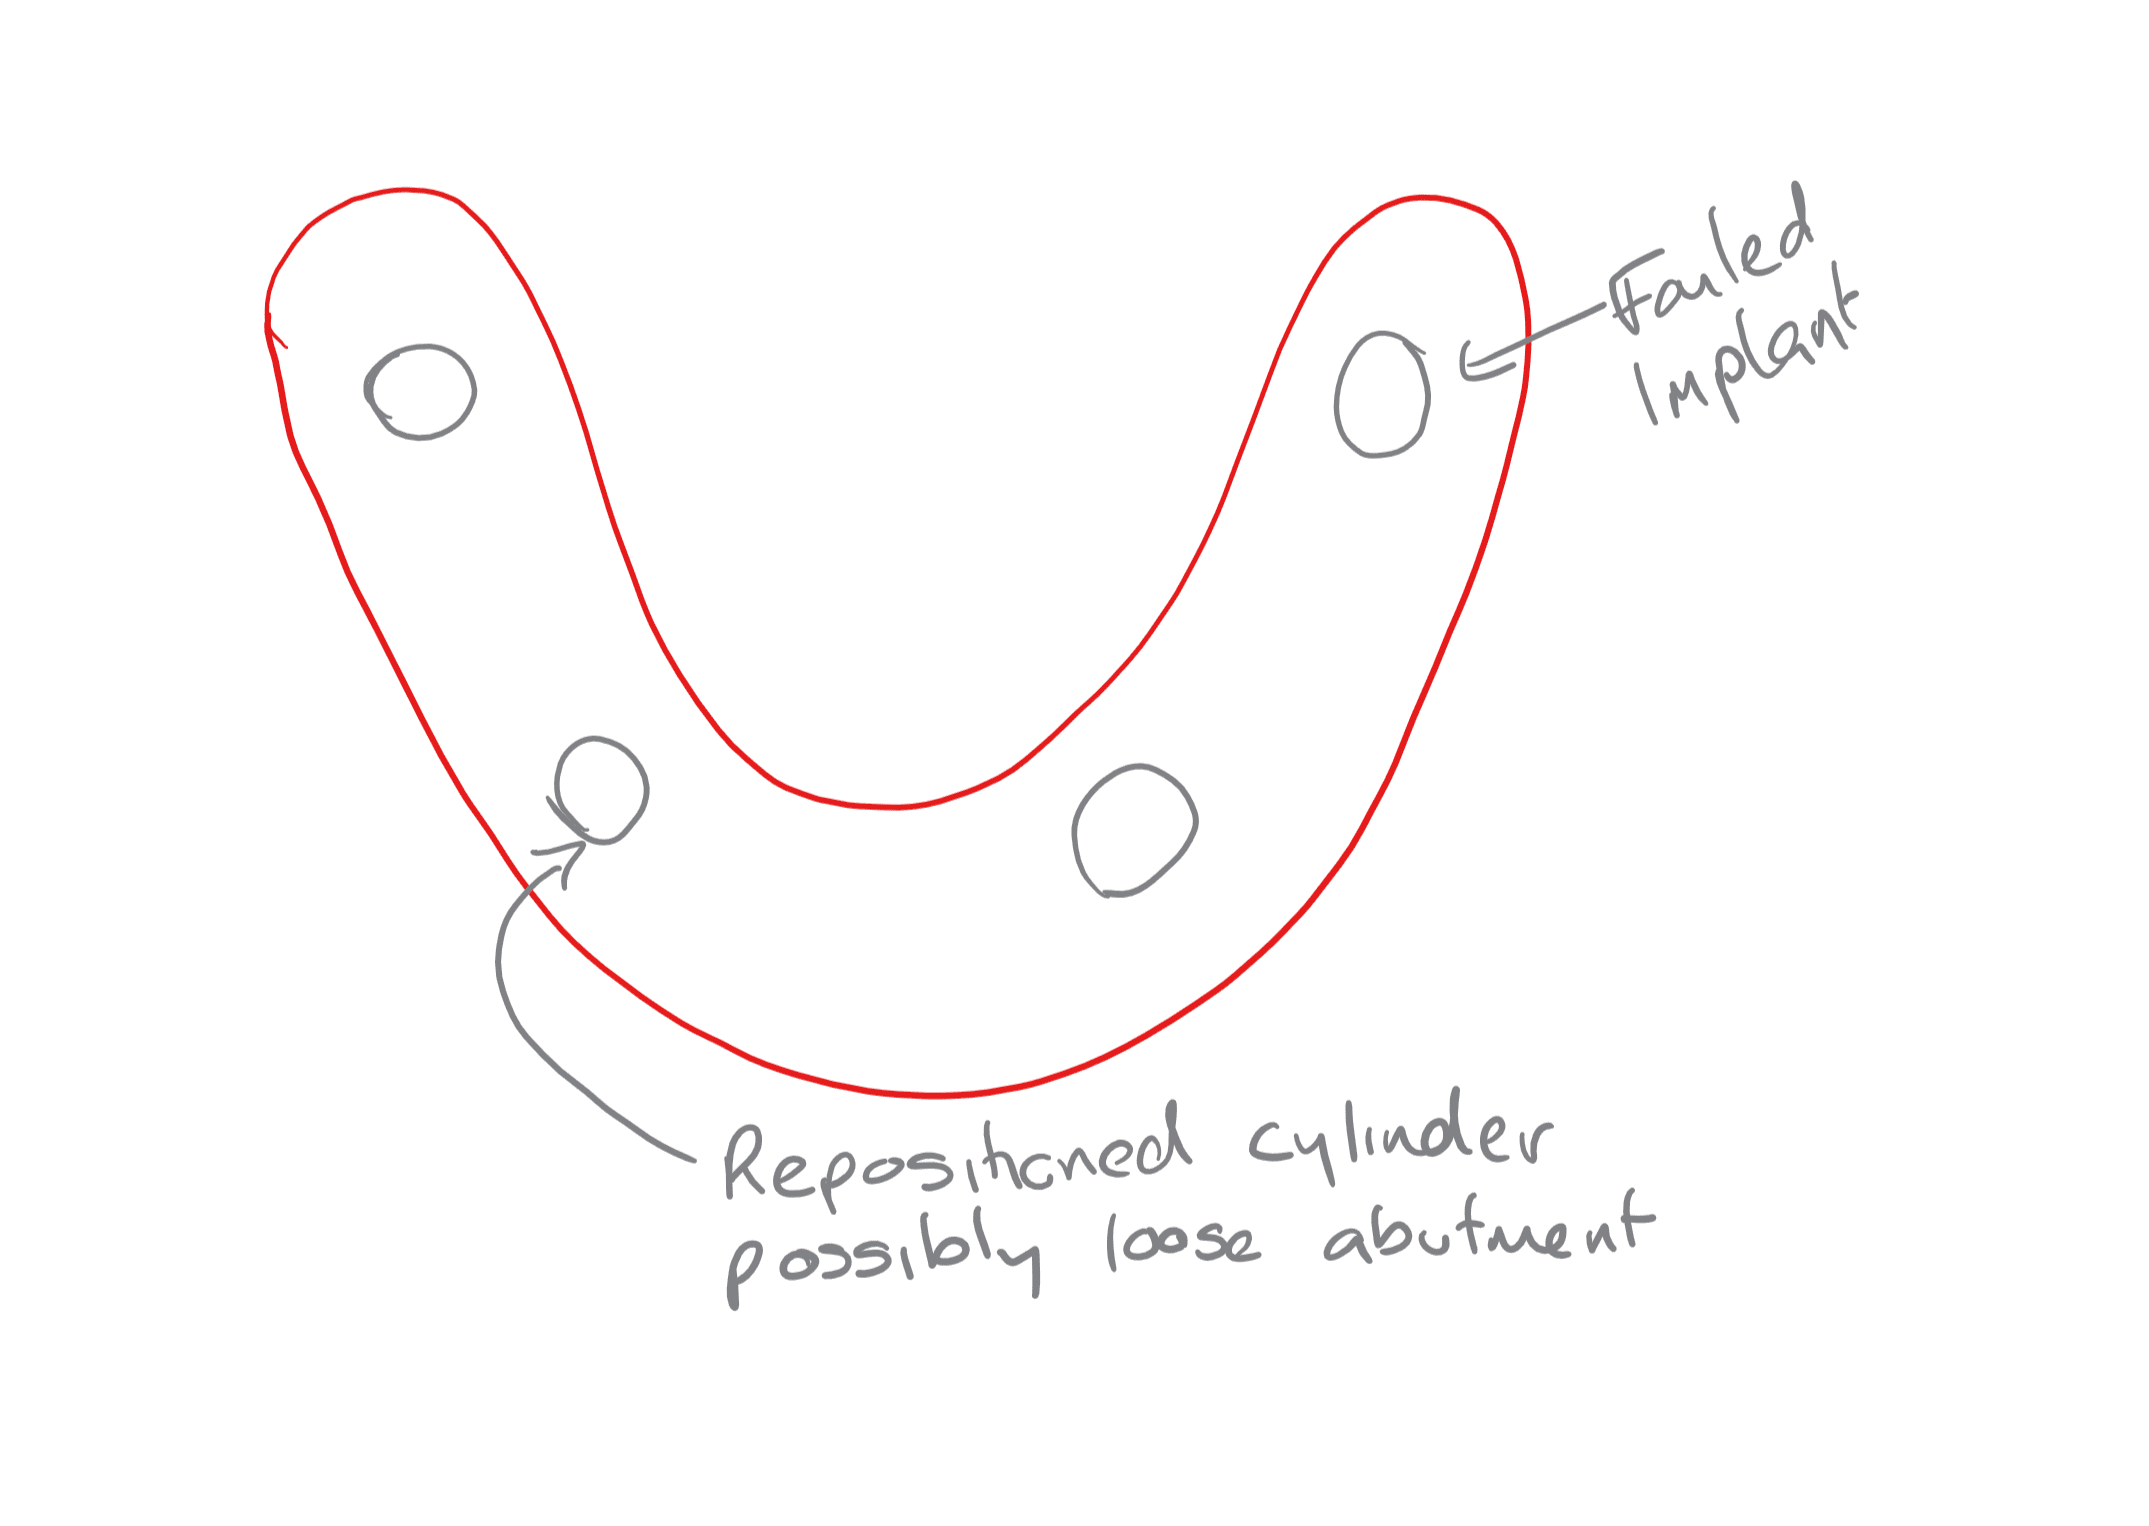
The way that I knew this was that once I have tightened one prosthetic screw (screwed in the bridge), one of the other copings was seated down fully, and the other was about 0.5mm off the abutment, as shown in the artistic drawing below.

How to manage this…
Without getting too bogged down with why this happened, what can be done to fix it.
I can’t make a fresh bridge – this will take too long, we also need time to replace the lower left implant – I needed to be able to make this bridge fit. After all, the aesthetics were good, the patient liked this bridge, its just that I noticed one cylinder was 0.5mm out of place.
The easiest way to do this is to reposition the cylinder in the mouth.
Step one is to remove the existing cylinder. This was quite difficult because I had used an ez-bar to increase the strength on the bridge. This would mean drilling through two metal bars to get to the cylinder.

After the cylinder is removed, you can then check the fit with the remaining two implants by screwing them in. With one screwed in fully, the fit can be checked either visually, or by taking a radiograph – which is more accurate.
After ensuring that the fit is good on the two implants, I then tightened the coping that we removed onto the abutment, ensuring that there is no contact between the bridge and the prosthetic coping.

Now, all we need to do is join everything up together in this position.
Before you do this, make sure that you fill up the access screw chamber. If you get acrylic in that, it will be a complete pain to remove.
To do this I use Gingifast by Zhermack. It turns into a rubber like material and is great to fill these screw channels up temporarily between visits. If you don’t have this, then you can use PTFE tape.
To join the bridge to the prosthetic coping, I use a product called Q Resin by Bredent, it’s a strong chairside acrylic. All you do is bond the existing acrylic and screw down the bridge and coping onto the abutments. Then squirt the Q Resin into the space.
We are not looking for a perfect finish here, just enough to secure the two things together.

So that is the hard stuff all done.
Now all you do is remove the whole bridge, ensure that there is no movement of the newly connected cylinder, and fill all the areas that you were not able to fill while it was in the mouth.
Now, this would have been a lot easier to do if there was a model to work from, but sometimes this is not possible – either way, its still the same steps, its just a little more tricky in the mouth.
Once you have built up all the defects, you just smooth and polish the area you have been working on, and thats it – it looks almost as good as new!


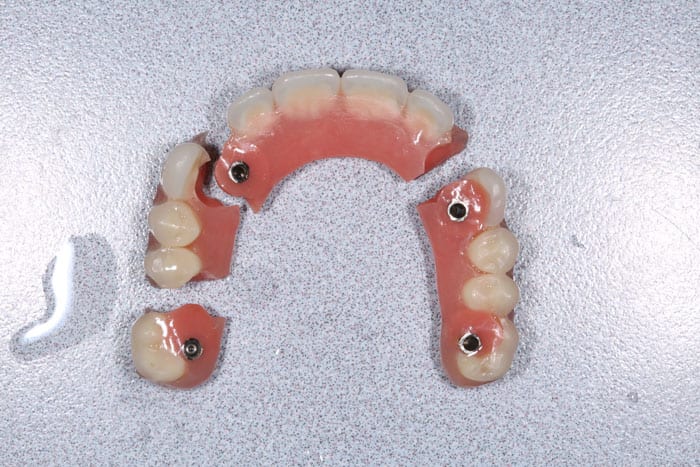
Now, while I was writing this for you, I had a major disaster with another patient! Have a look at the photo below! This was just 10 days after doing the treatment.
If you want to see how this was managed, then pop your details in the box below and I will drop you an email when its all written up for you.
Back to this case, we all know complications can happen, so what could I have done to stop this from happening in the first place?
I had a post op OPG showing everything, but I couldn’t see anything wrong with the abutment connection.
Maybe its worth taking PA radiographs of every connection. For me, I think this would be the best solution, that way I can be surer of knowing if everything is seated.
Ultimately, I think that there was some movement in the system that caused the implant to fail.
This could have been an abutment that was not fully tightened down or some distortion in the bridge.
When I think about this in detail, I think this was most likely due to an abutment not being fully tight, and not the abutment of the failed implant!
My thinking behind this is that it is very difficult to get the prosthetic impression wrong – the impression is always verified before making the bridge (well, it was in this case).
It is much easier to think that an abutment is fully seated on the implant, when in fact it is engaged in the bone – which is what I thought happened to the distal implant abutment. But when this implant came out in my hand, the abutment was fully tight – so it was unlikely to be that one.
It is then possible that at a routine visit, I tightened the loose abutment (straight abutment) and due to bone resorption after the implant placement, the abutment was able to be fully tightened onto the implant (and not bone)
This would then explain the need to reposition the cylinder!
Because of this, I now incorporate an extra step in the surgery.
I have since switched to either Neodent dental implants, or Straumann for the majority of these cases, and the Neodent implants should be placed 1-2mm subcrestal. This will increase the chance of something like this happening.
So to avoid it, I countersink all my osteotomies with a regular round surgical bur.
When doing this, you need to be super careful not to damage the implant. Placing a temporary cover screw on the implant will help a lot – although the Neodent cover screws don’t cover the whole implant surface, and you need to order them separately!
To do this, you need good magnification and good light!

Another (and possibly easier) way to achieve a similar result is to use a larger drill just for the countersink part. I personally don’t like to do this because I feel I don’t have enough control, and its so easy to countersink too much, and possibly compromise the amount of cortical bone for primary stability. Its not normally a problem in the mandible, but can be an issue in the maxilla.
Anyway, I think I’ll finish here – I realise many of my friends who read this are not that interested in the minor details of the surgery!
I think the take-home message here is if you want to be excellent at anything, there will always be road bumps on the way. The stakes are always high, this is the health of our patients that we are in control of, and we should dissect every slight complication and take steps for it to never happen again!
In the next few weeks, I will talk about the massive bridge failure I showed you a picture of above, so to get a notification about that, make sure you sign up using the form below.
Until then – have a great day! Speak soon
Gurs
Get Blog / Cases to your Inbox
If you want to be notified by email when I post a new case, just click the button and fill in the form