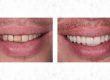

So recently I completed a case and I put It on Facebook and Instagram and it got loads of really good feedback, was quite a happy I got all this feedback because it was a really difficult case and required loads of planning.
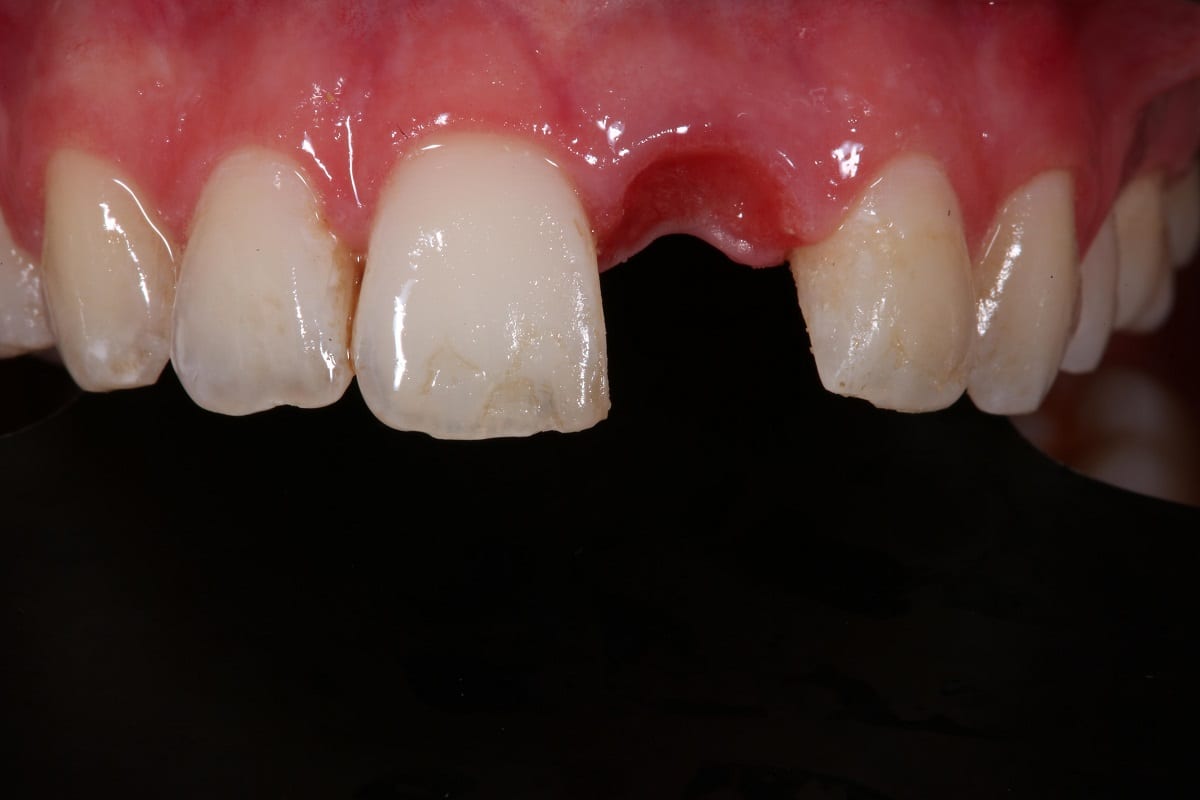
Basically, any implants at the front of the mouth when the patients got really high lip line – scare me. It is very difficult to get the gums to look really natural.
So in this case what I’m going to do is show you exactly how I did it because it’s actually quite a predictable way of doing the treatment.
Just by following the simple protocol you should be able to get the same results as long as the implant dentist and yourself the restorative dentist are planning this in a similar kind of way.
I’m not going to go over all the surgical stuff. I’m going to go straight into the temporization and forming the gums so that we get a really nice emergence because getting the tooth and getting the white part to look right is easy just to use a high-quality lab who knows what they’re doing so you can make the teeth look good.
It’s making the gums look natural which is really really difficult.
So to cut a long story short in terms of the surgical side we placed the implant.
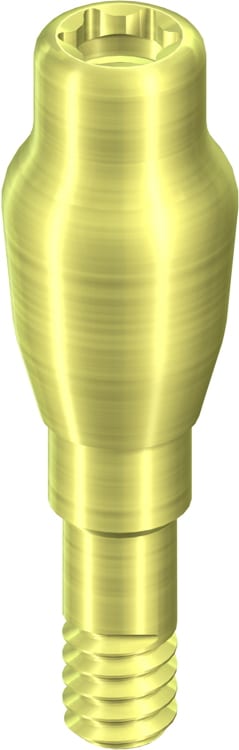
It was a Straumann implant with a narrow connection and I used a bottleneck gingival former which is really important because I did a connective tissue graft at the same time to help bulk out the gingiva and give me enough to play with to get this result.
The bottleneck gingival former lets the gums heal in a better way to help maximise the amount of soft tissue gained and let’s put pressure on the gums so that you can shape them in a more natural kind of way.
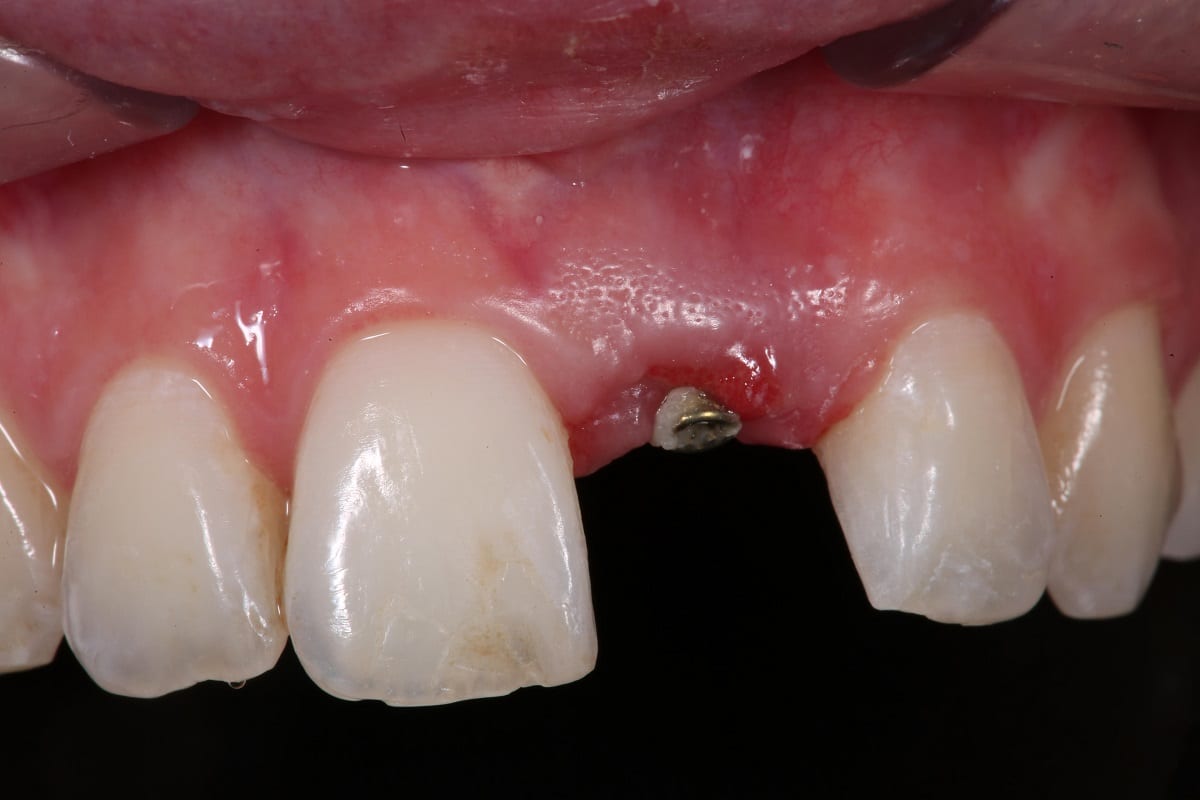
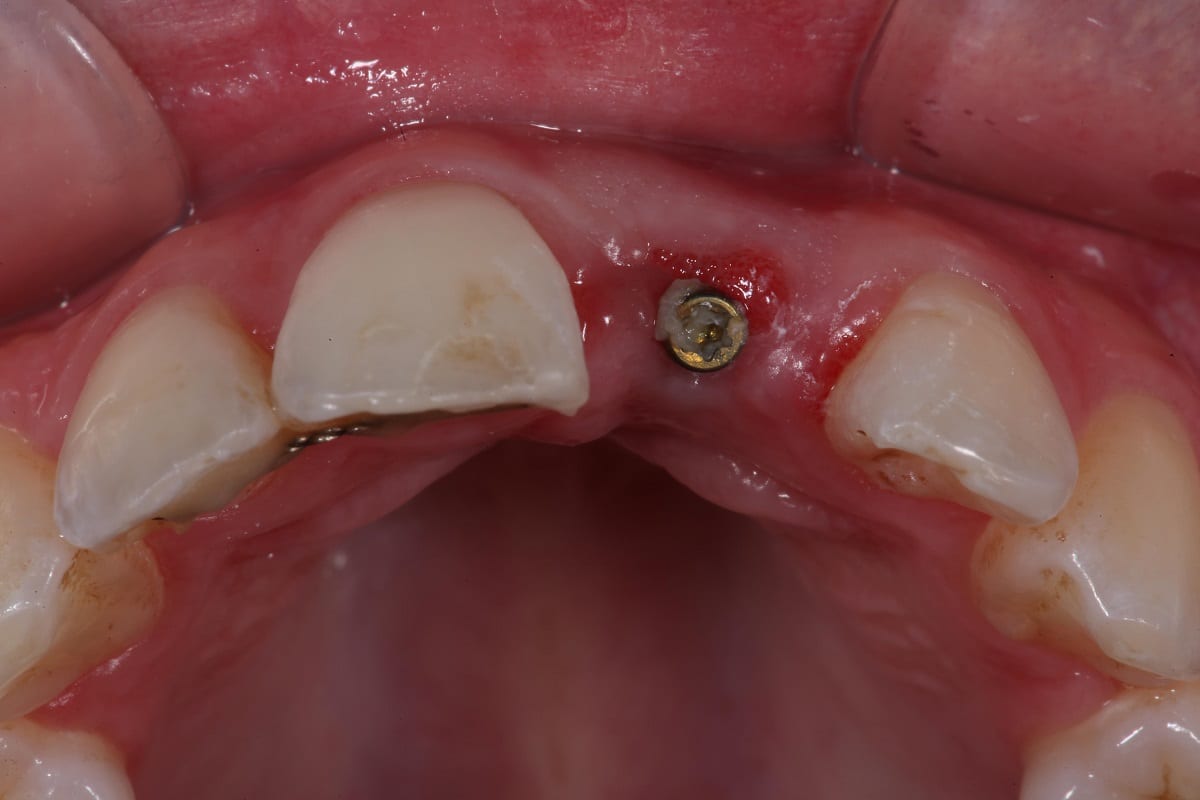
This is a 5mm high bottle-shaped gingival former. My restoring dentists would get their patient back like this so they can restore the dental implant in the way suggested in this article
So this is what it looks like once the gums have healed around this gingival former and you can see it’s just poking out through the gum.
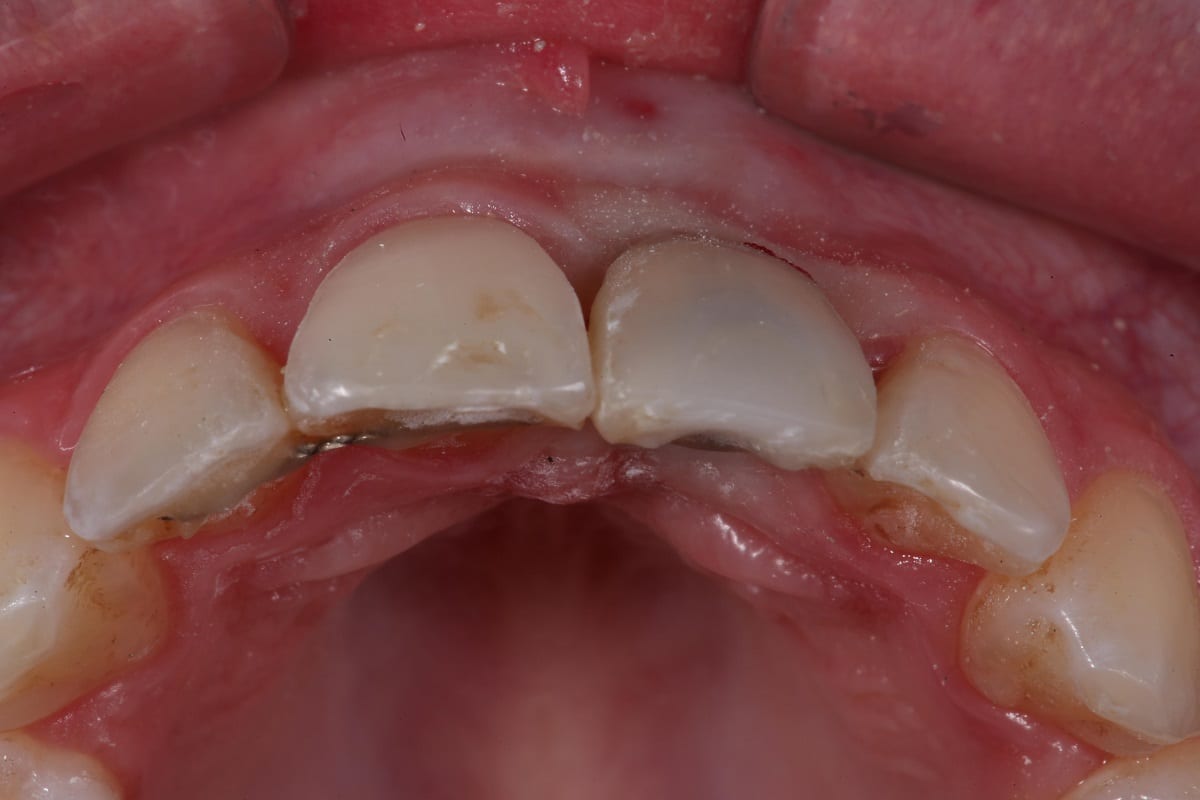
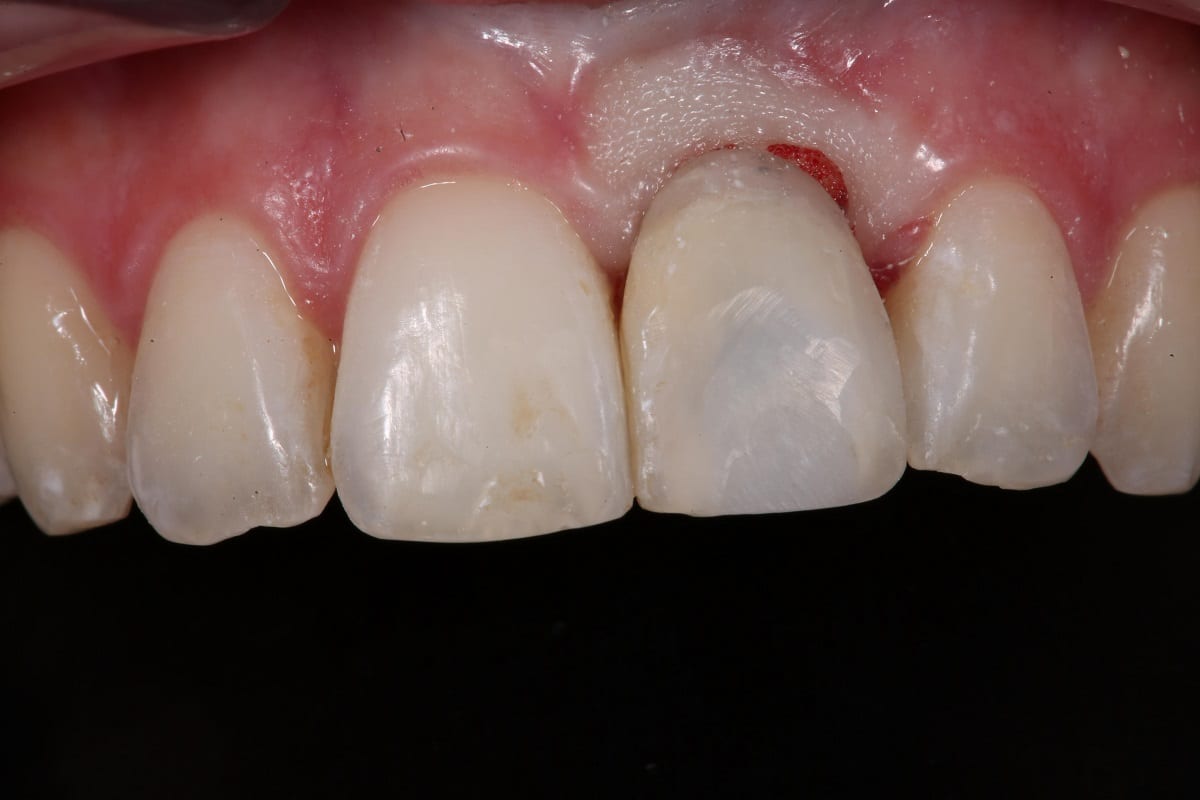
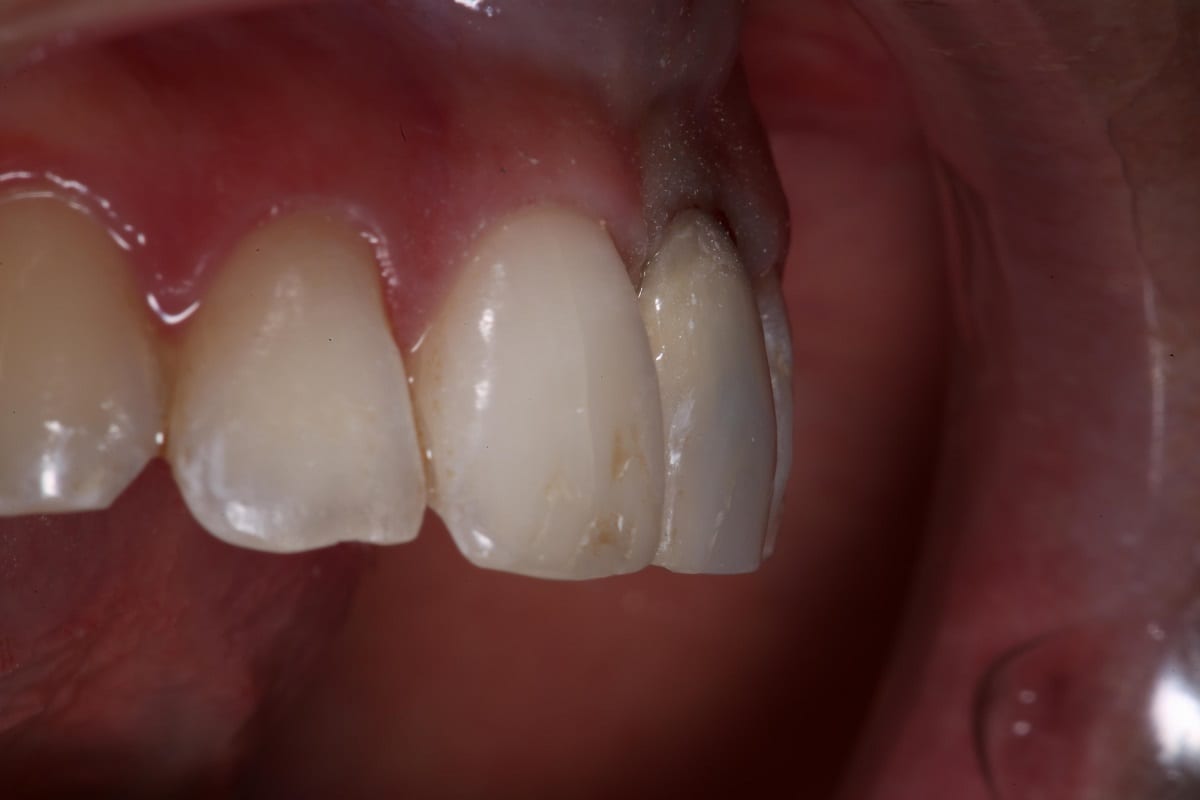
As a temporary measure, we have the patient’s natural upper left central tooth which is glued on just the composite to the upper right one.
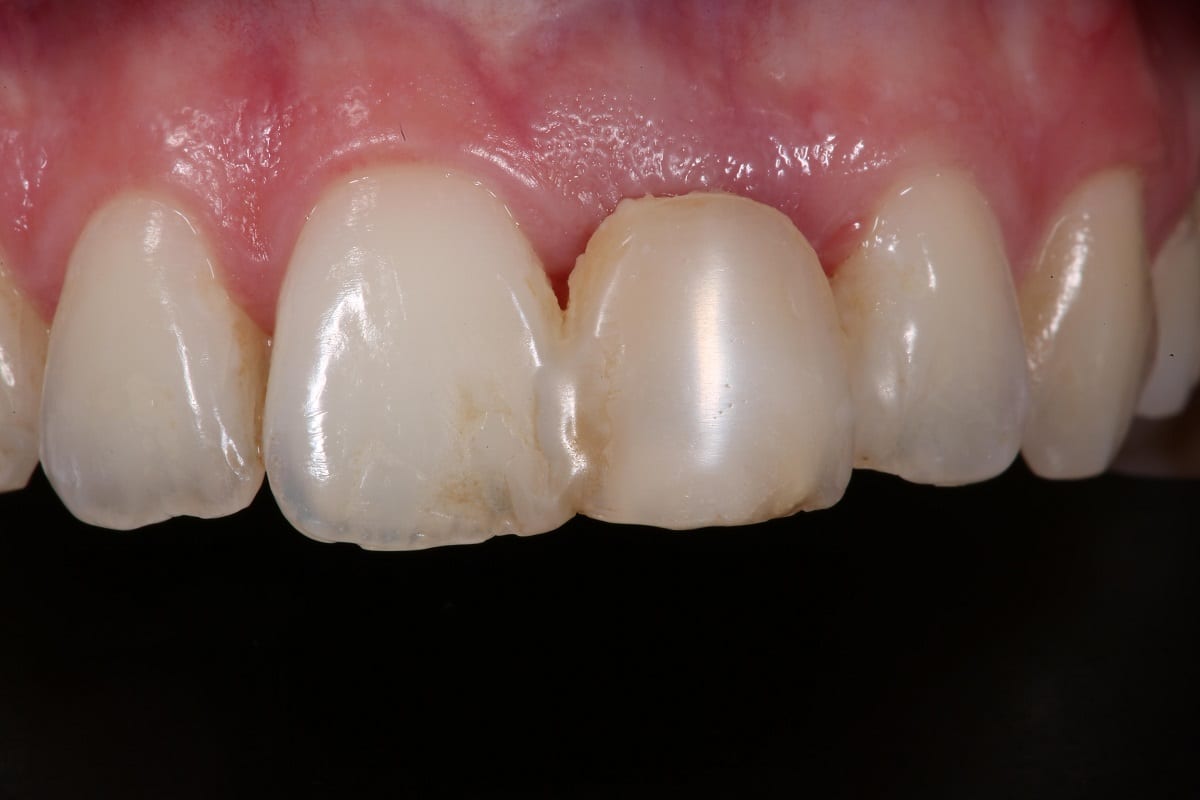
At the time of implant placement, I just ground it down so gingivally it’s much shorter than the than the upper right one.
You can see that in this photograph here this just gives the gums enough space to heal and it’s not going to attract plaque and it’s not going to cause any healing issues while the implant is in position.
So next what you need is a temporary prosthetic abutment to go into the implant and we’re going to use our existing temporary tooth to create a complete temporary restoration on our implants with the sole purpose of forming the gingiva.
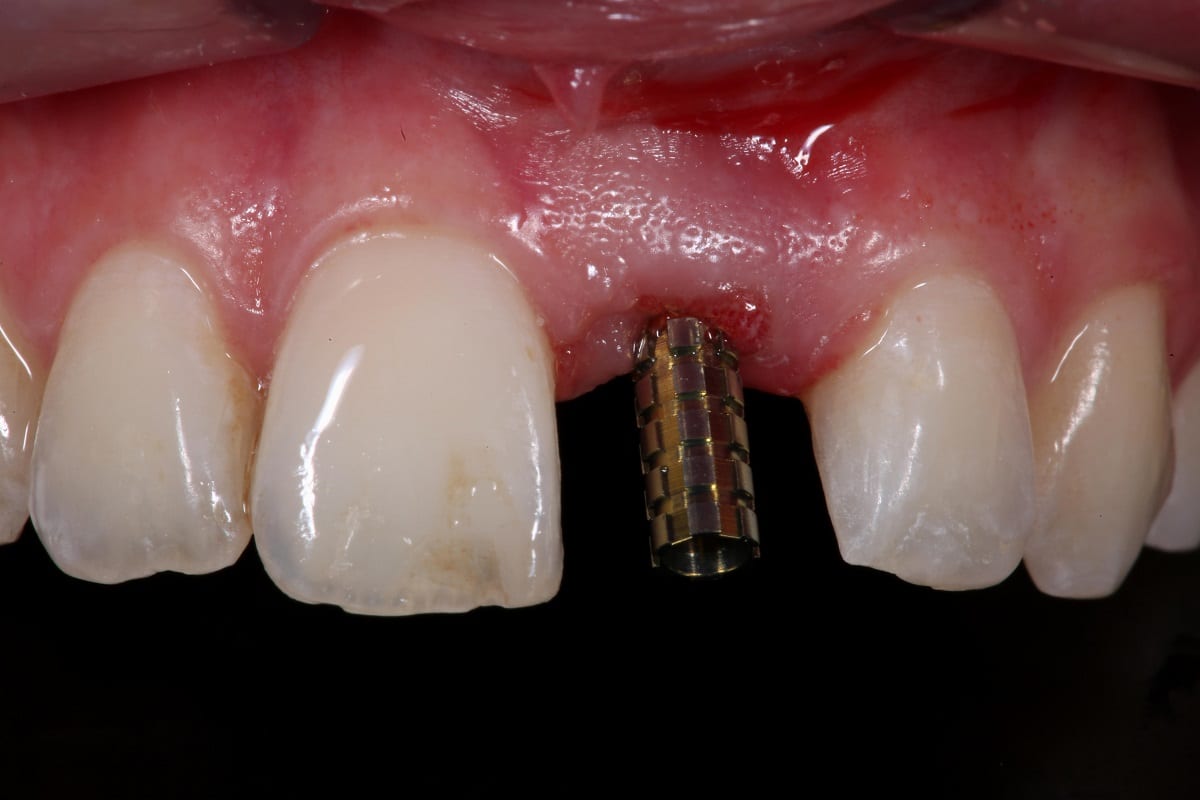
First of all you have to get the patient nice and numb, taking this bottleneck healing abutment cannot be done without anaesthetic. It’s designed in such a way that it requires a little bit pressure, in fact, you might need some kind of tweezers possibly even orthodontic wiengart pliers which is what I think I used to remove the gingival form just because of the shape and how the gum grows around the gingival former.
So once it’s out you just then put in your temporary abutment as you can see here. And you can see that there’s no space at the gingiva for anything else. So we’re going to have to push all the gingiva out to get the right kind of emergence.
Next what I did was hollow out the temporary tooth so we’ve got straight line access and the temporary tooth is in as good a position as possible and you can see that in this photograph here.
At this stage, you use some flow and just connect the prosthetic cylinder to the temporary tooth.
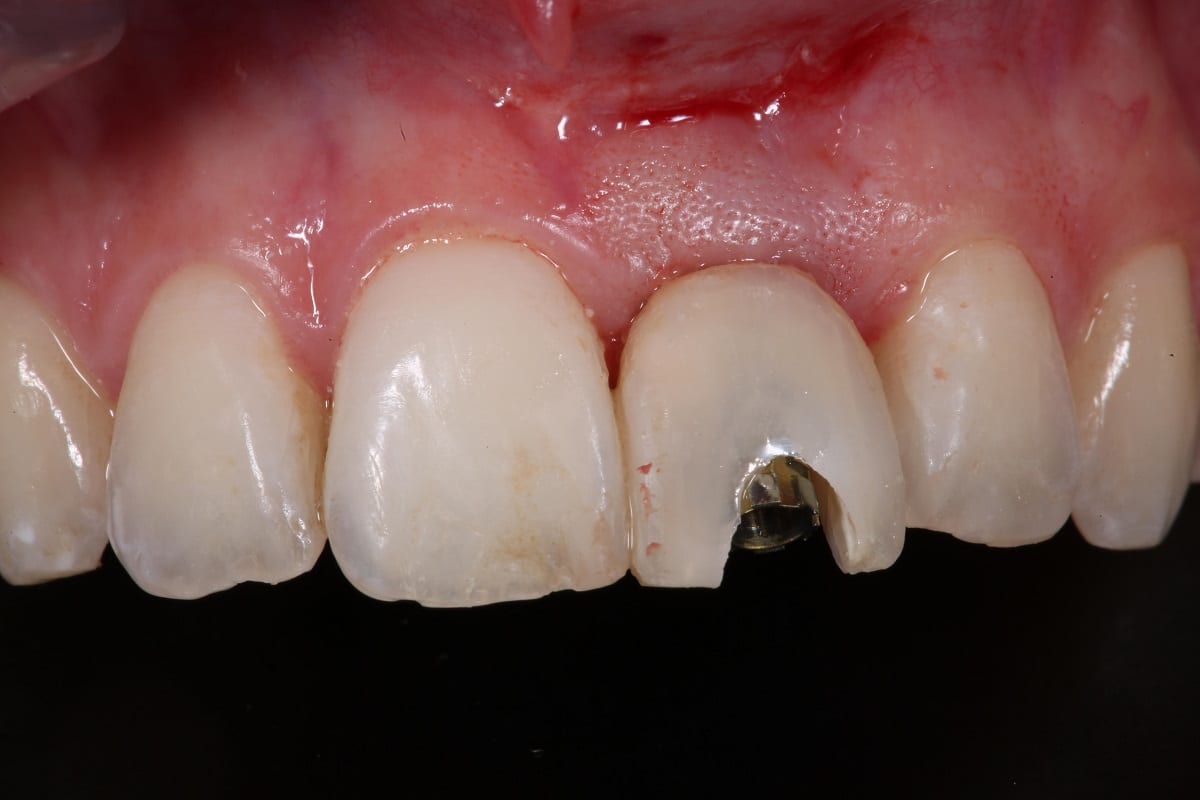
Then you remove the whole thing and you can see that there is a massive void between the temporary abutments and the temporary tooth. So then what you do is etch, bond and flow to fill up the hole of that void.
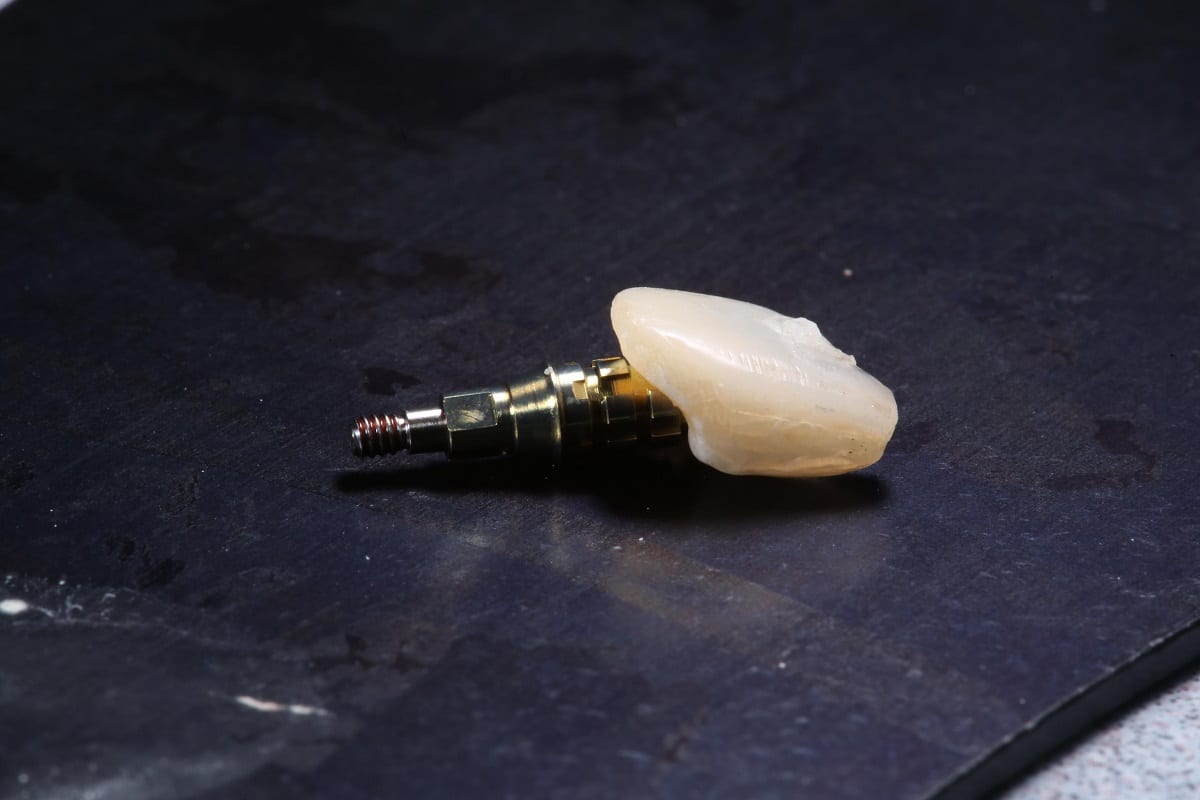
Then you remove the whole thing and you can see that there is a massive void between the temporary abutments and the temporary tooth. So then what you do is etch, bond and flow to fill up the hole of that void.

So what I do is measure the heights and how much extra height I need on the gingiva on the upper left one and then I just add it with the flow to the temporary tooth when it’s not in the mouth.
Then all you do is fill it up and you can see where the margin of the abutment is and you create this kind of emergence of the temporary teeth all the way around.
Buccally you want a bit more of a concavity maybe this could have worked better if the implant was a little bit deeper but because right now we’ve got quite an abrupt kind of angle coming labially.
Mesial and Distally we just want straight lines rather than any concavity. (well, maybe a slight concavity…)
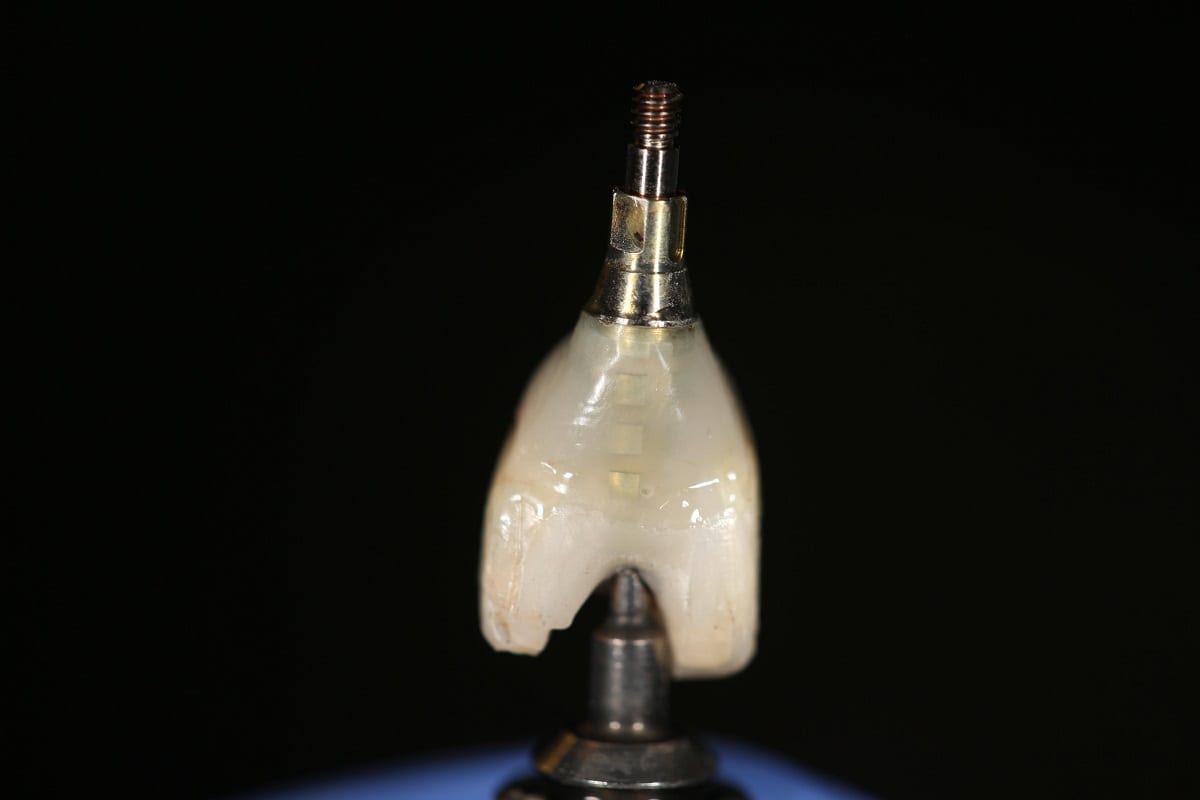
So then once you’ve done all, you screw in to try it in – this is going to hurt the patient if they’re not numb when you’re putting this in because this is going to put a lot of pressure on the gums and you can see here that once this is screwed in how much blanching we have around the gums but don’t worry about this it isn’t a problem – it’s going to feel a bit tight once the anesthetic wears off but usually within a couple of hours this is back to normal.
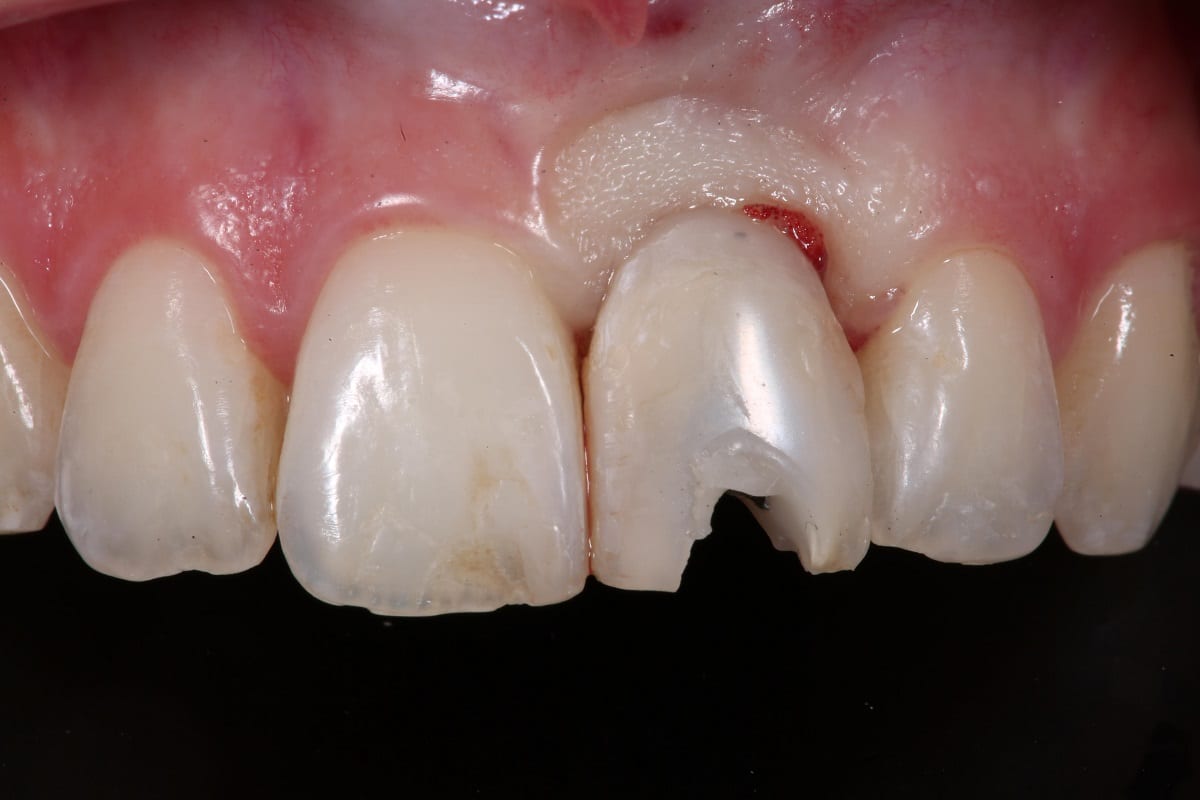
We’ve got nice healthy keratinized tissue it’s just under a bit of pressure to evert it and to get the gingival margins as symmetrical as possible and then you cover up all your screw holes with flow and you let it heal. The patient then comes in a few weeks later and everything looks a lot neater a lot tidier. Now it’s really plain sailing because the gums have been made to look perfect.
It was always in the treatment plan to have the front four teeth done. So then all we did was do our tooth preparation on all four incisors we took a stump shade so the lab could understand what the shade was.
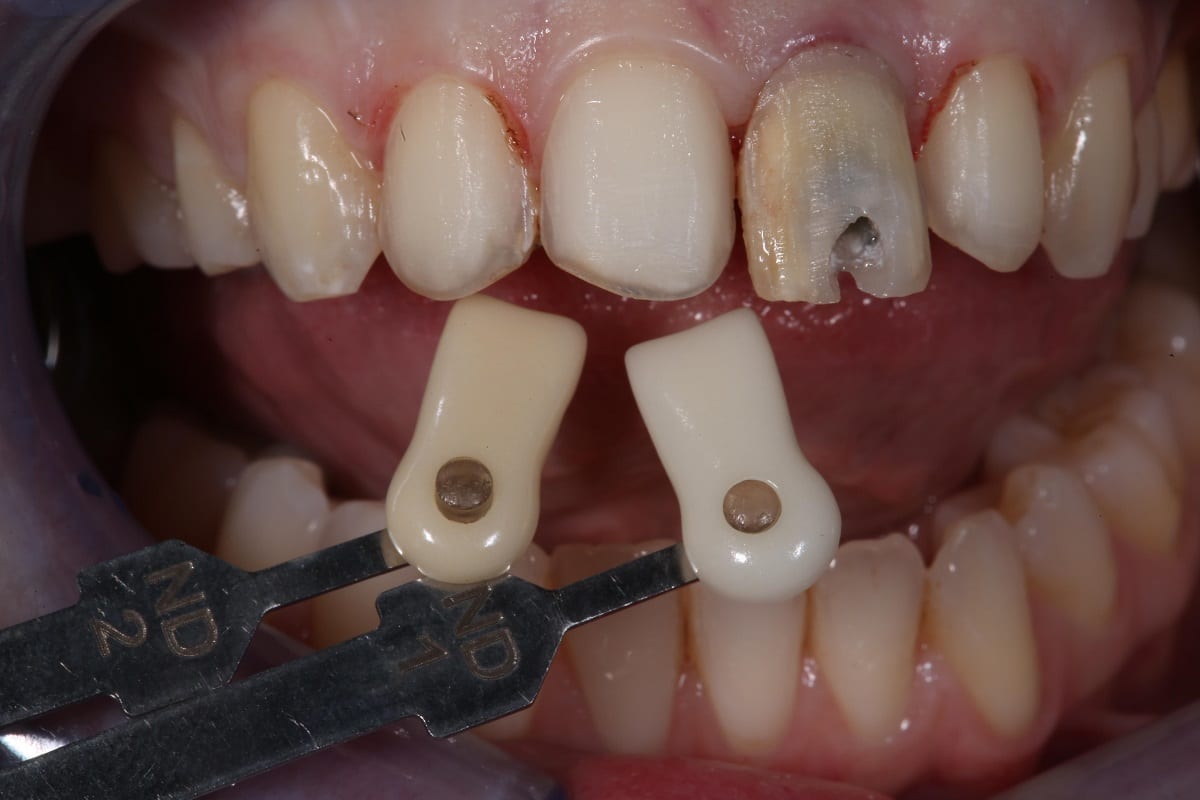
At all times I kept the temporary tooth on the implant in the patient’s mouth so that the gums are held in a more secure position.
As soon as you remove that the gums will collapse in a fraction but the longer you have it out the more they’re going to collapse in. So what I did was I took the temporary tooth out and straightaway I put the impression post in and I filled that crevice up with composite flow and set it, that supports the tissue.
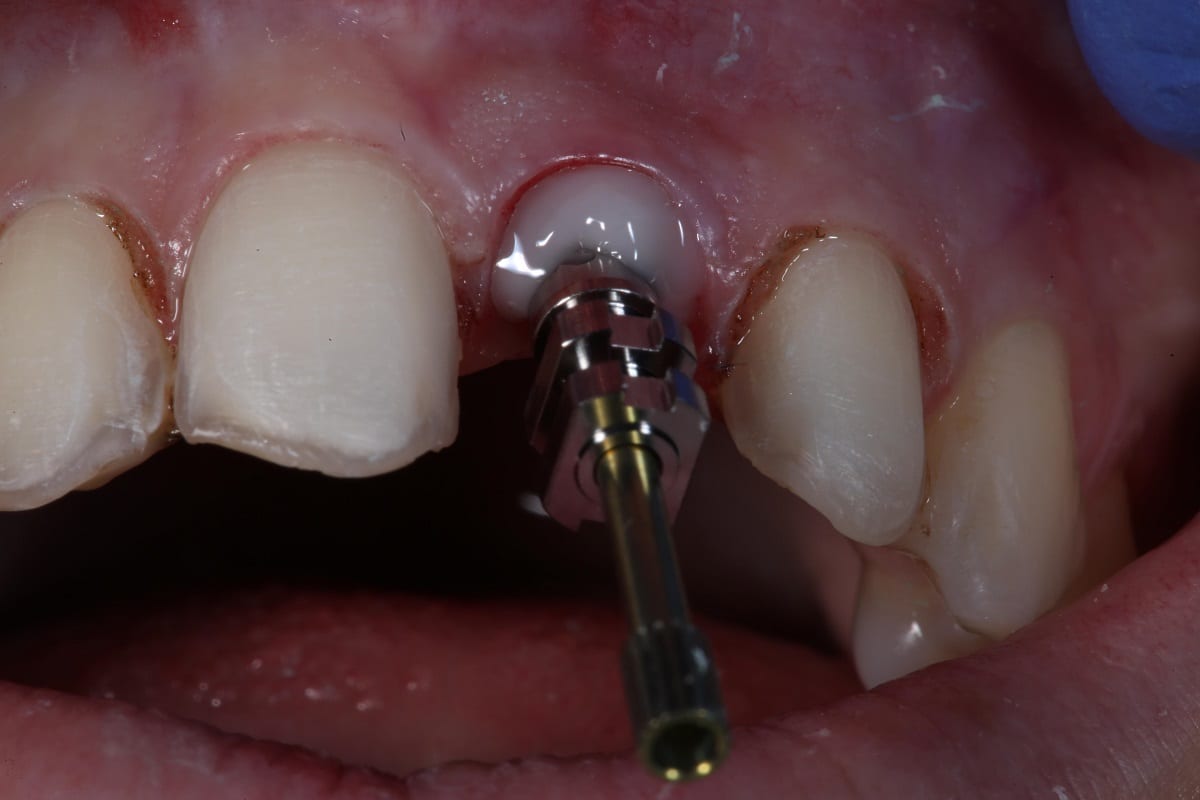
Now there is a better way of doing this and I wish I had done that that involves using a lab analog and putty and doing this all extra orally but I didn’t have an analog to hand and I didn’t think it would make that much of a difference but it does make a little bit of difference and I think I would have got a better result had I have done this but anyway we’ve got decent results as it was, we did the trial smile and the purpose of the trial smile is for the patient to say yes I like it or no I don’t.
All four units are made in composite. I sent the work off to Beaver Dental Technology and then they sent me the lab work back. We fitted it. This is what the provisionals looked like.
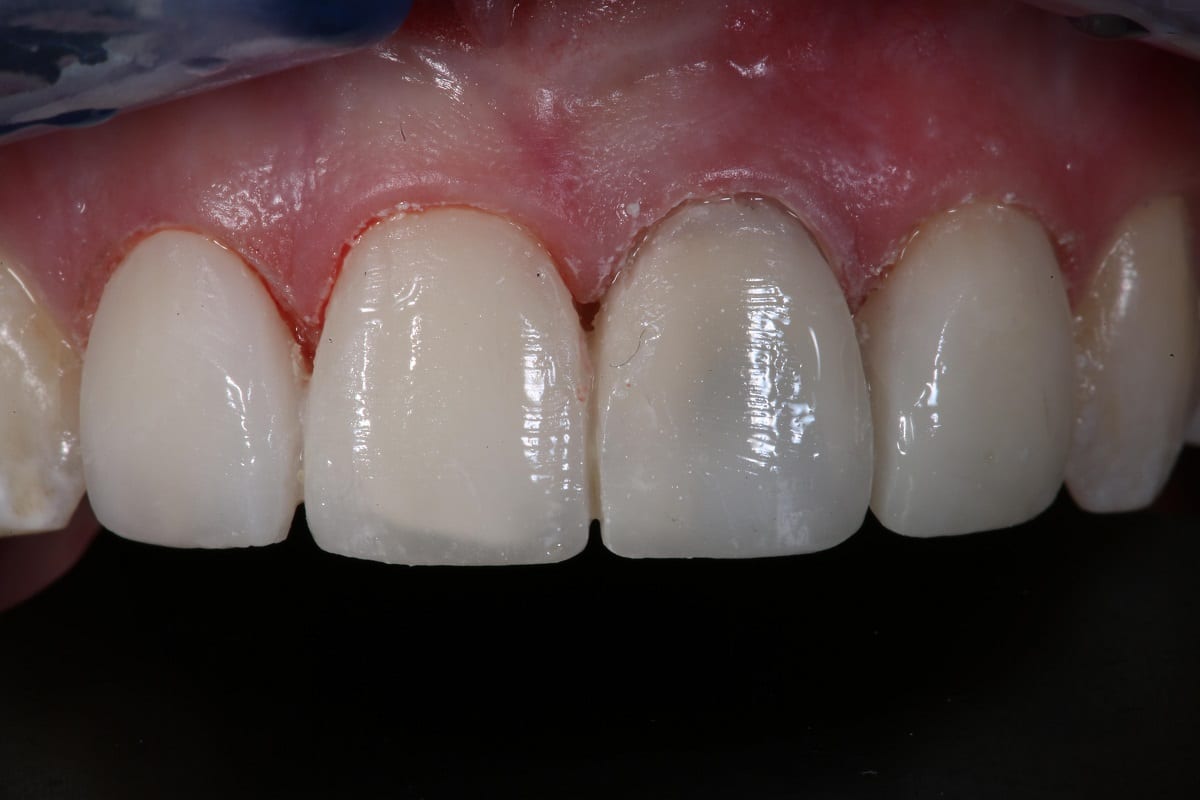
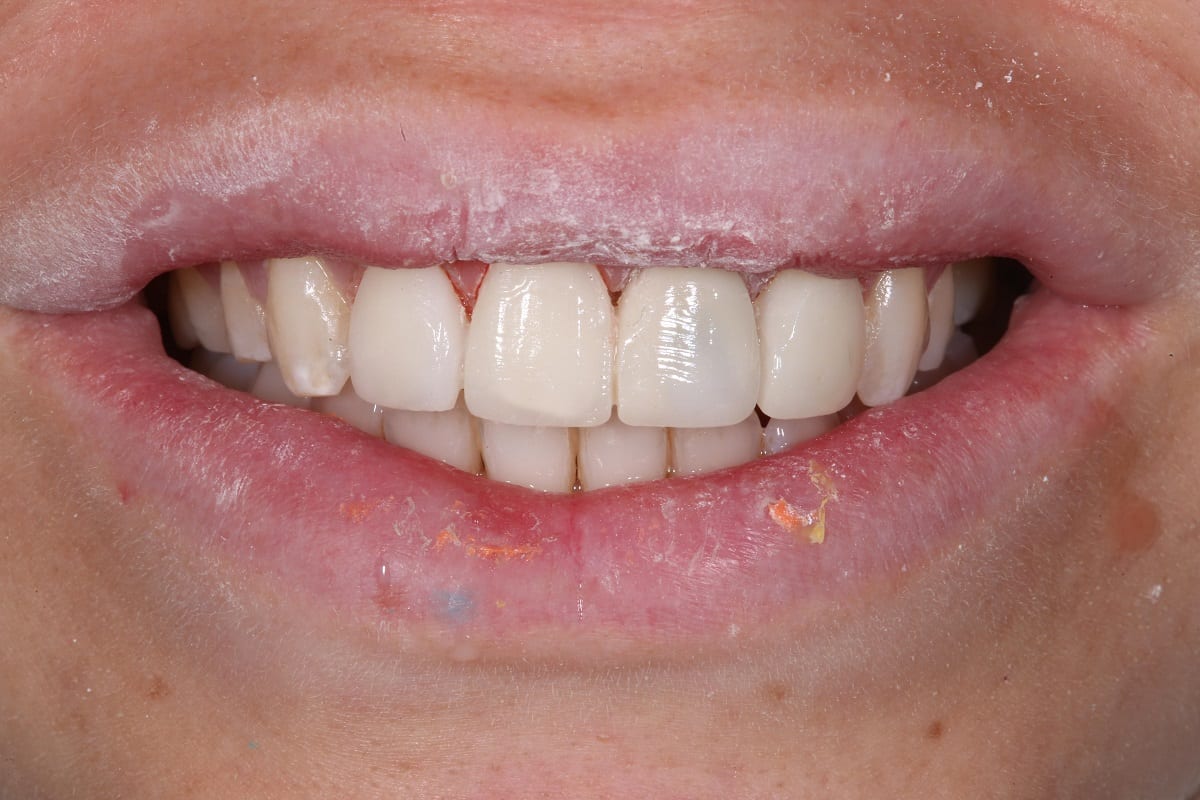
So the gums are all a little raw but patient is really happy with it, and understands this is just a test drive, the finals will look better – trust me!
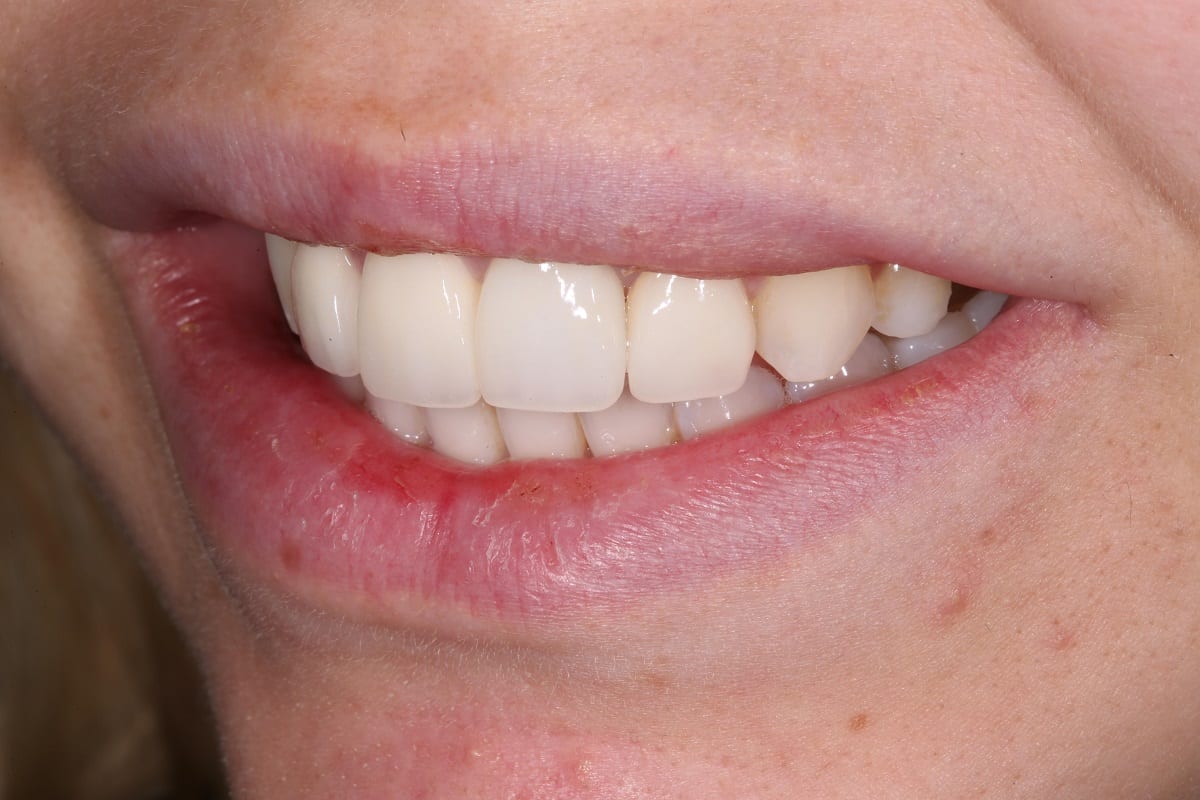
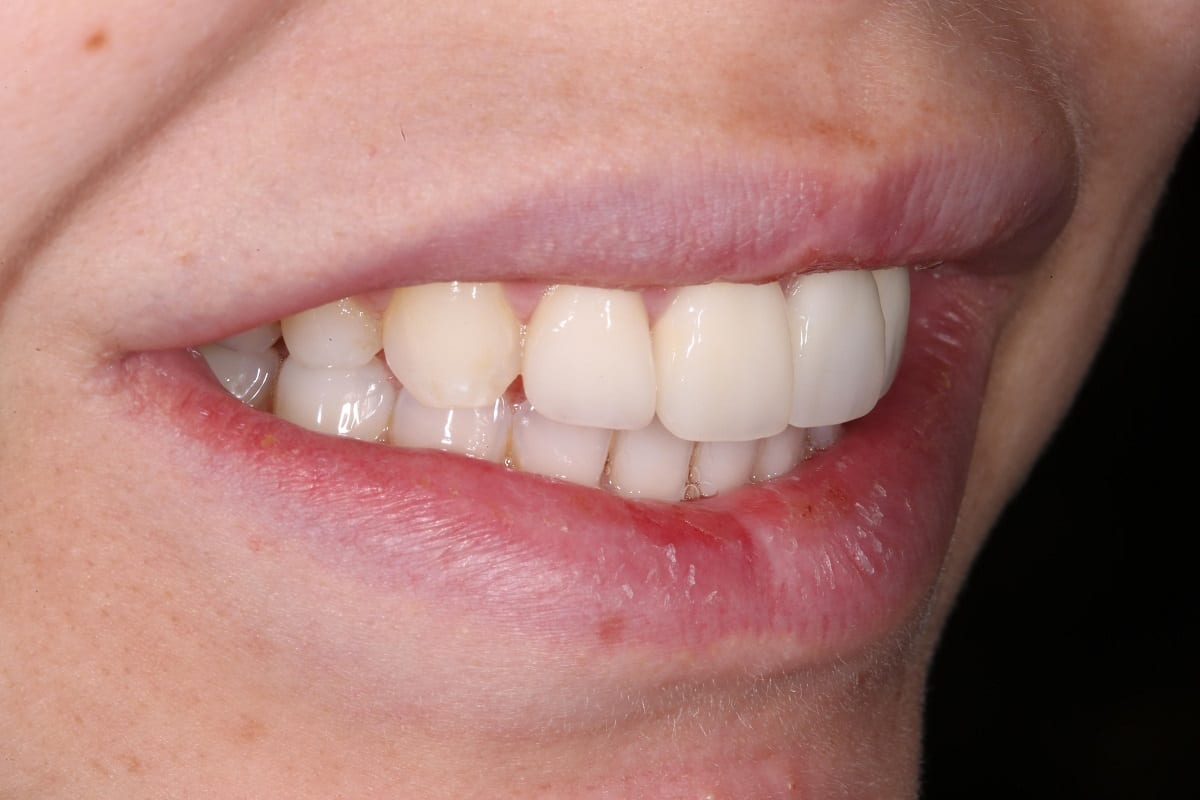
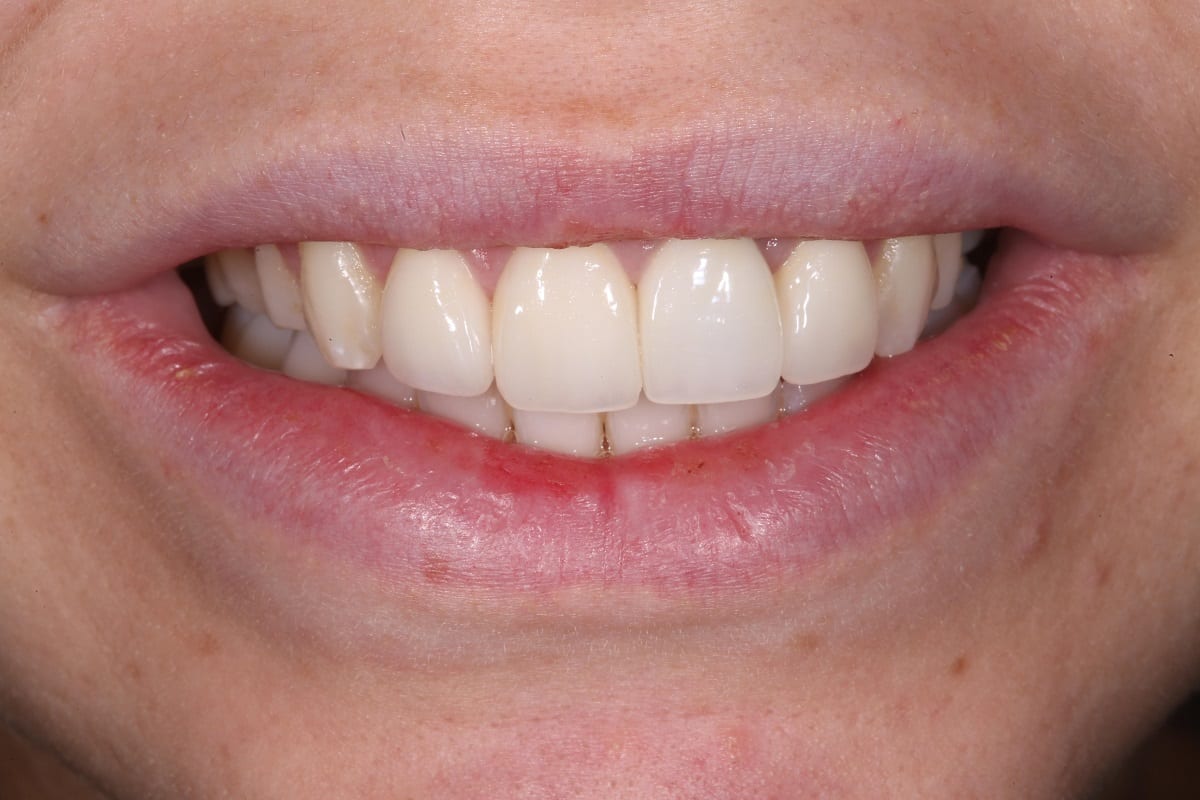
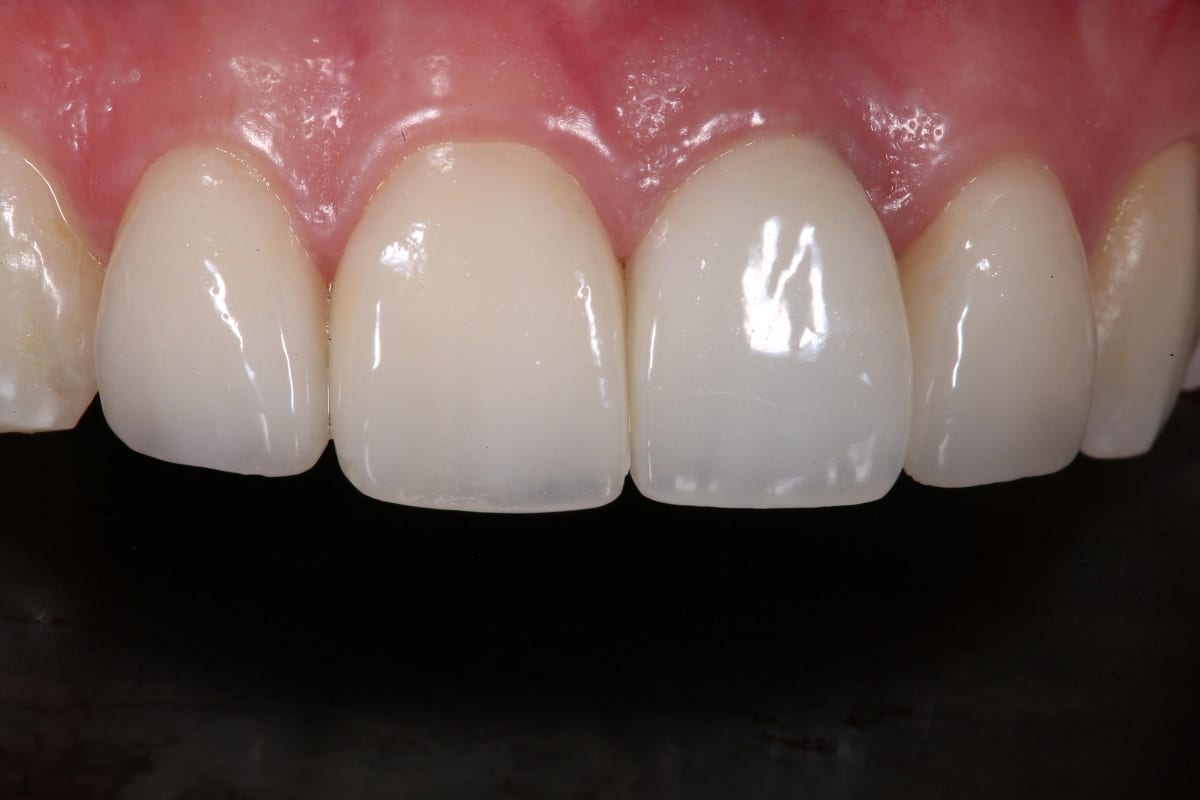
This is what it looks like, it was a cement retained crown.
It would’ve been better if it was screw retained but because of the kind of shape of the maxilla bone it wasn’t possible to place the implant in that ideal a position and the patient wasn’t really willing to go for additional bone grafting.
It looks really nice – I mean the patient was really happy with it but if I’m being really picky, and, I did mention this to the lab technician, Phil and he agrees: the implant tooth looks a little bit white in comparison and you know a little bit higher in value and you always get this the distal aspect the distal papillae of the implant tooth is a little bit more shallow it’s not as full a papilla and also I don’t know if it’s just me but the gum around the implant looks a little bit darker than the other side.
I don’t know if that’s the implant showing through.
I’d be surprised if it was because there is quite a lot of thickness between the implant and the gum but that’s how it looks like on the photograph.
Anyway, the patient is really happy with it. Ultimately that’s what matters but I think you do need to be critical of every single one of your cases to push yourself further and to make yourself even better.
Also It’s really important to take photographs of each and every one of your cases no matter how good or how bad each one is a learning curve but also in addition to that it’s an asset which you have now I’ve shown this case to many patients after doing this and they’ve all been really impressed with it and it’s helped to shape their decision on what they want to do with regard to their own teeth.
So it is also worth using a really high quality lab technicians to do this to get the work looking amazing and it’s really important if you don’t place your own implants to work with a dentist who does the prosthetics and does all of this in their own clinic as well so they can help you and guide you to get the best results.
To get a result like this you need to start the planning of the placement of the implant. That’s key because that’s one thing once thats in you cannot change it and you need to do the tissue graft at that time as well because doing a tissue graft later once the implants in doesn’t work especially in my hands.
So these results are definitely reproducible and anyone can do it.
It just takes a little bit of planning and understanding the case.
So I hope he finds useful if you got any questions or comments you can just pop them below. You can also follow me on Instagram or find me on Facebook.