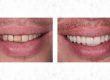
With cosmetic orthodontics being so popular, its easy to think that its a simple procedure, and after a little initial planning, its just a case of putting a brace on, working through the wires, then fitting your retainers.
The good news is that for many cases, this is all that’s needed. But how about those cases that still need tweaking at the end – what can you do to finish your cases so that your patients all leave ultra happy with their end smile?
Well, this is when you start driving in manual.
When you place a fixed appliance on the teeth, each bracket will have a predetermined prescription. This means that the final position of the tooth is programmed in, and the tooth will fall in that position if the bracket slots are aligned perfectly.
But how often is a system 100% perfect?
Most adult orthodontic brackets have a bracket slot width of 0.022 inches, and many orthodontic systems (for GDP’s) go up to a 0.018in wire. Not only is the wire too small, but it is also the wrong shape. Let’s exaggerate this and see what effect it can have.
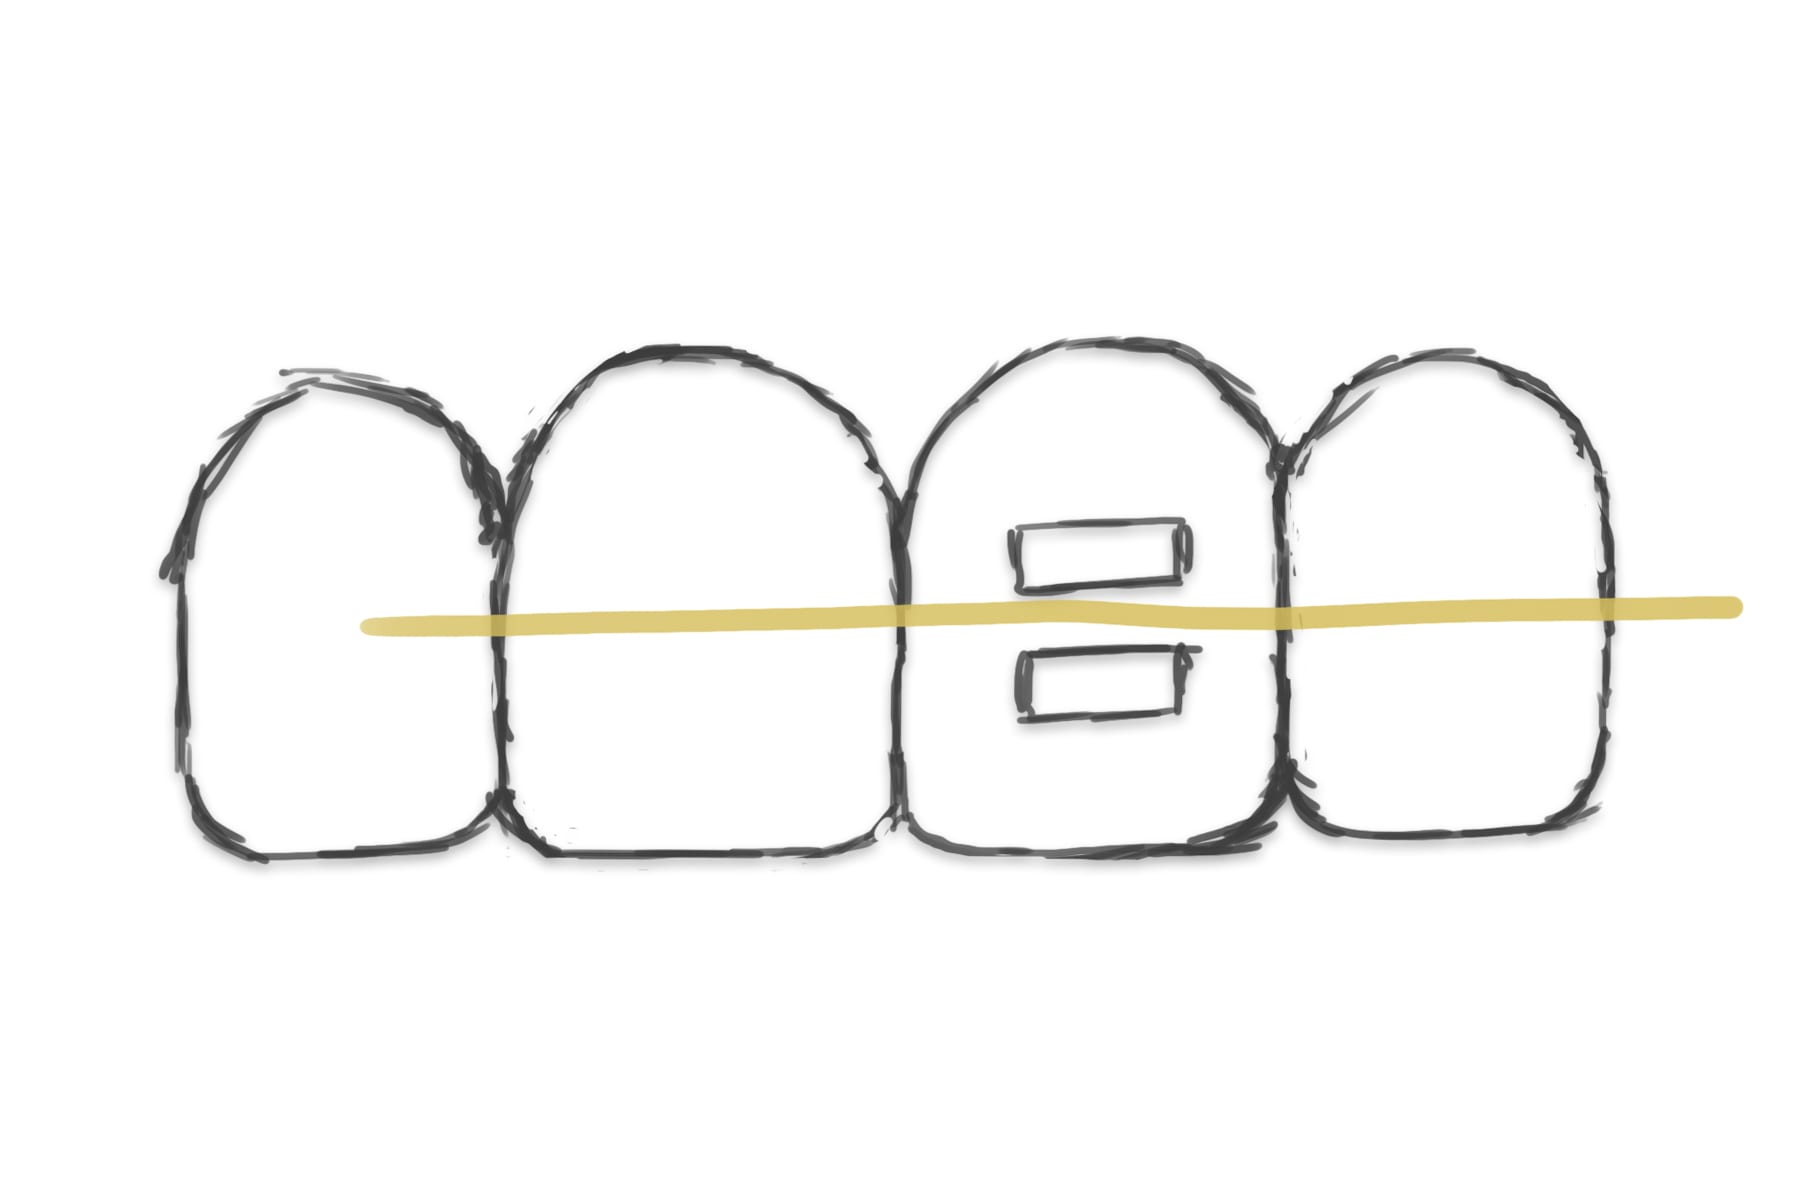
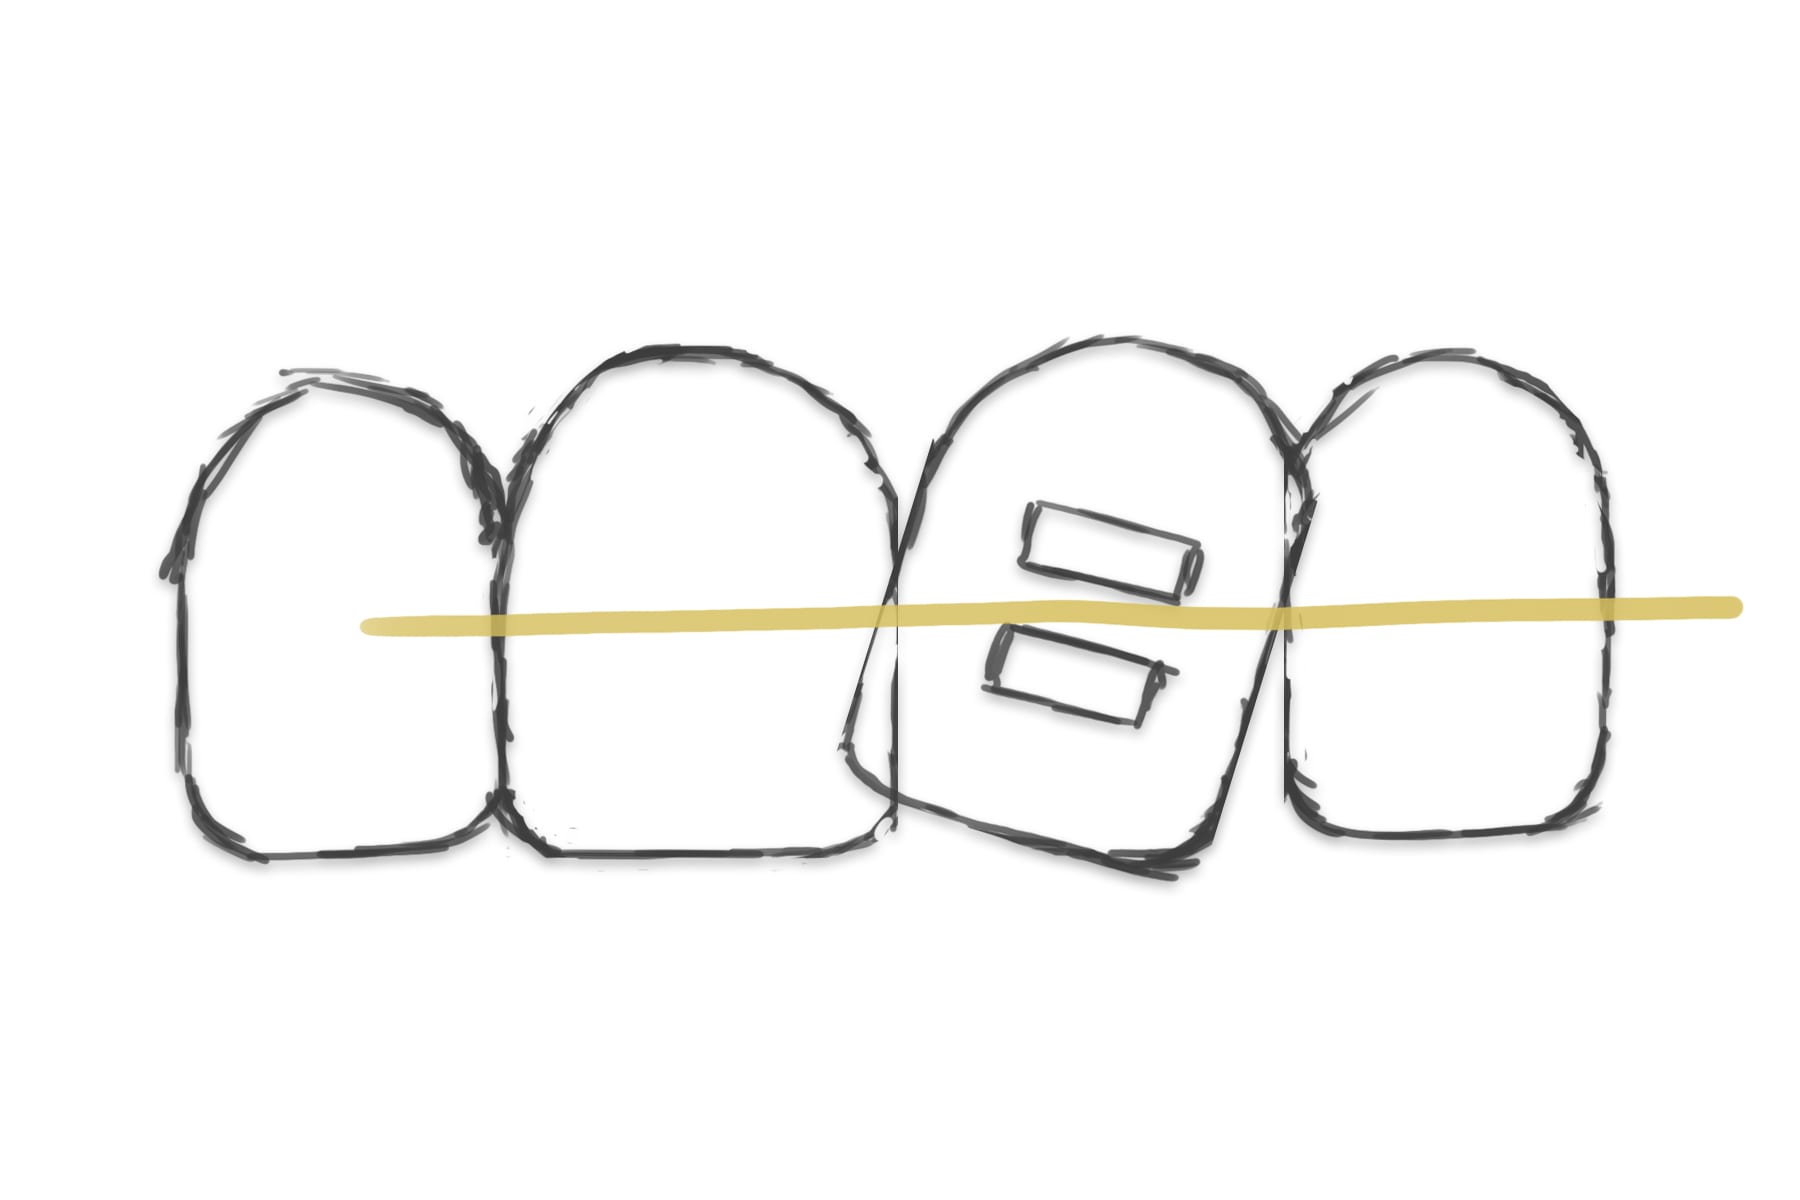
So in both of these cases the wire in the brackets is straight, so the wire has done all it can, but in the second photo, the teeth are not aligned because the size of the wire is not big enough to fill the slot, so there is some play in the system.
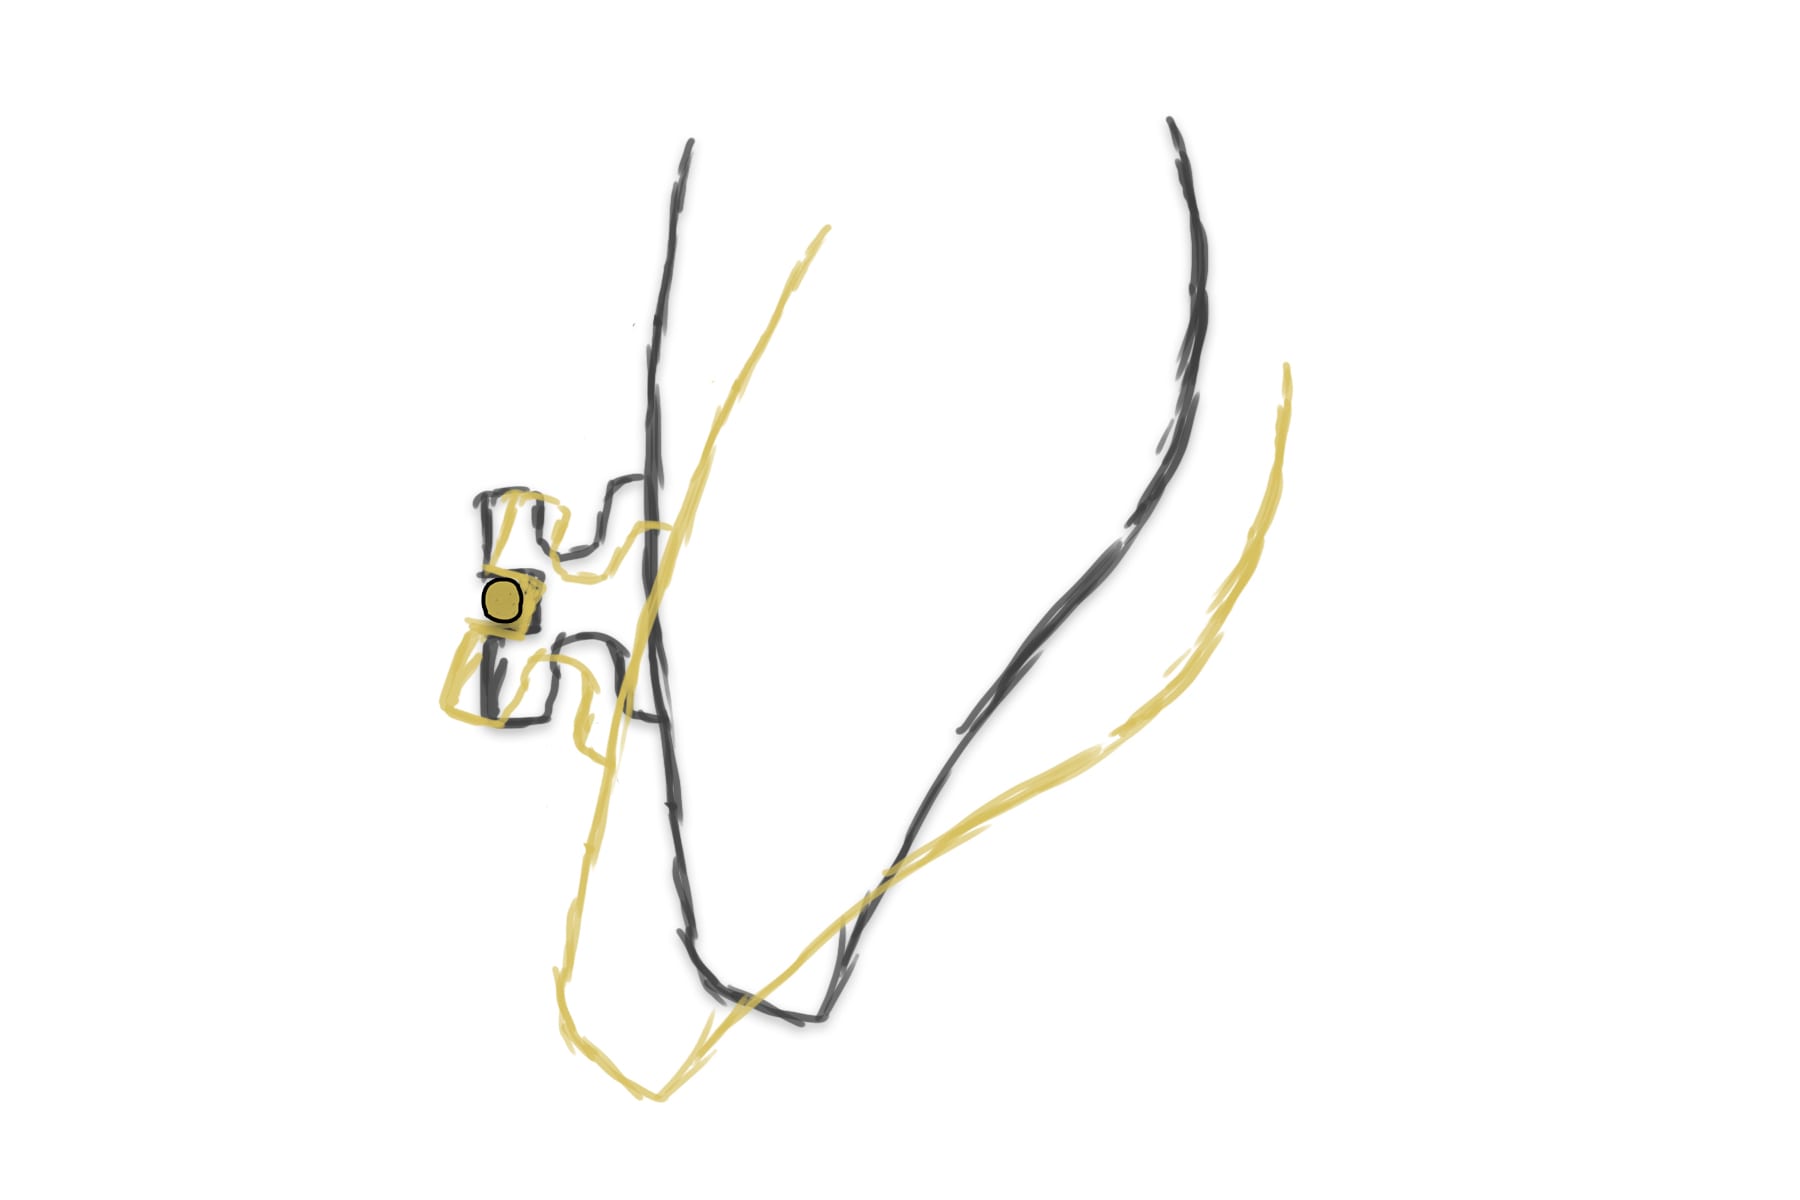
In this diagram, the wire is in the same place, but because the wire is round, the bracket can rotate freely around the wire.
Sometimes this is actually useful, for example, if you want to tilt the lower teeth back to disguise a mild class 3, then having a round wire in the slot can be very important.
Both of these issues could be minimised if the wire used was thicker, say a 0.021 inches wire in a 0.022 inches slot, and the wire was rectangular rather than round (maybe a 0.021×0.025 Steel, for example).
Usually, this is not a big issue in most cases. A bigger problem is not ligating the wire fully
Wire Ligation
Let’s say you have a rotation in a lower incisor that just won’t fix itself! (we have all been there!)
The first thing you need to check is: is the wire fully engaged in the brackets.
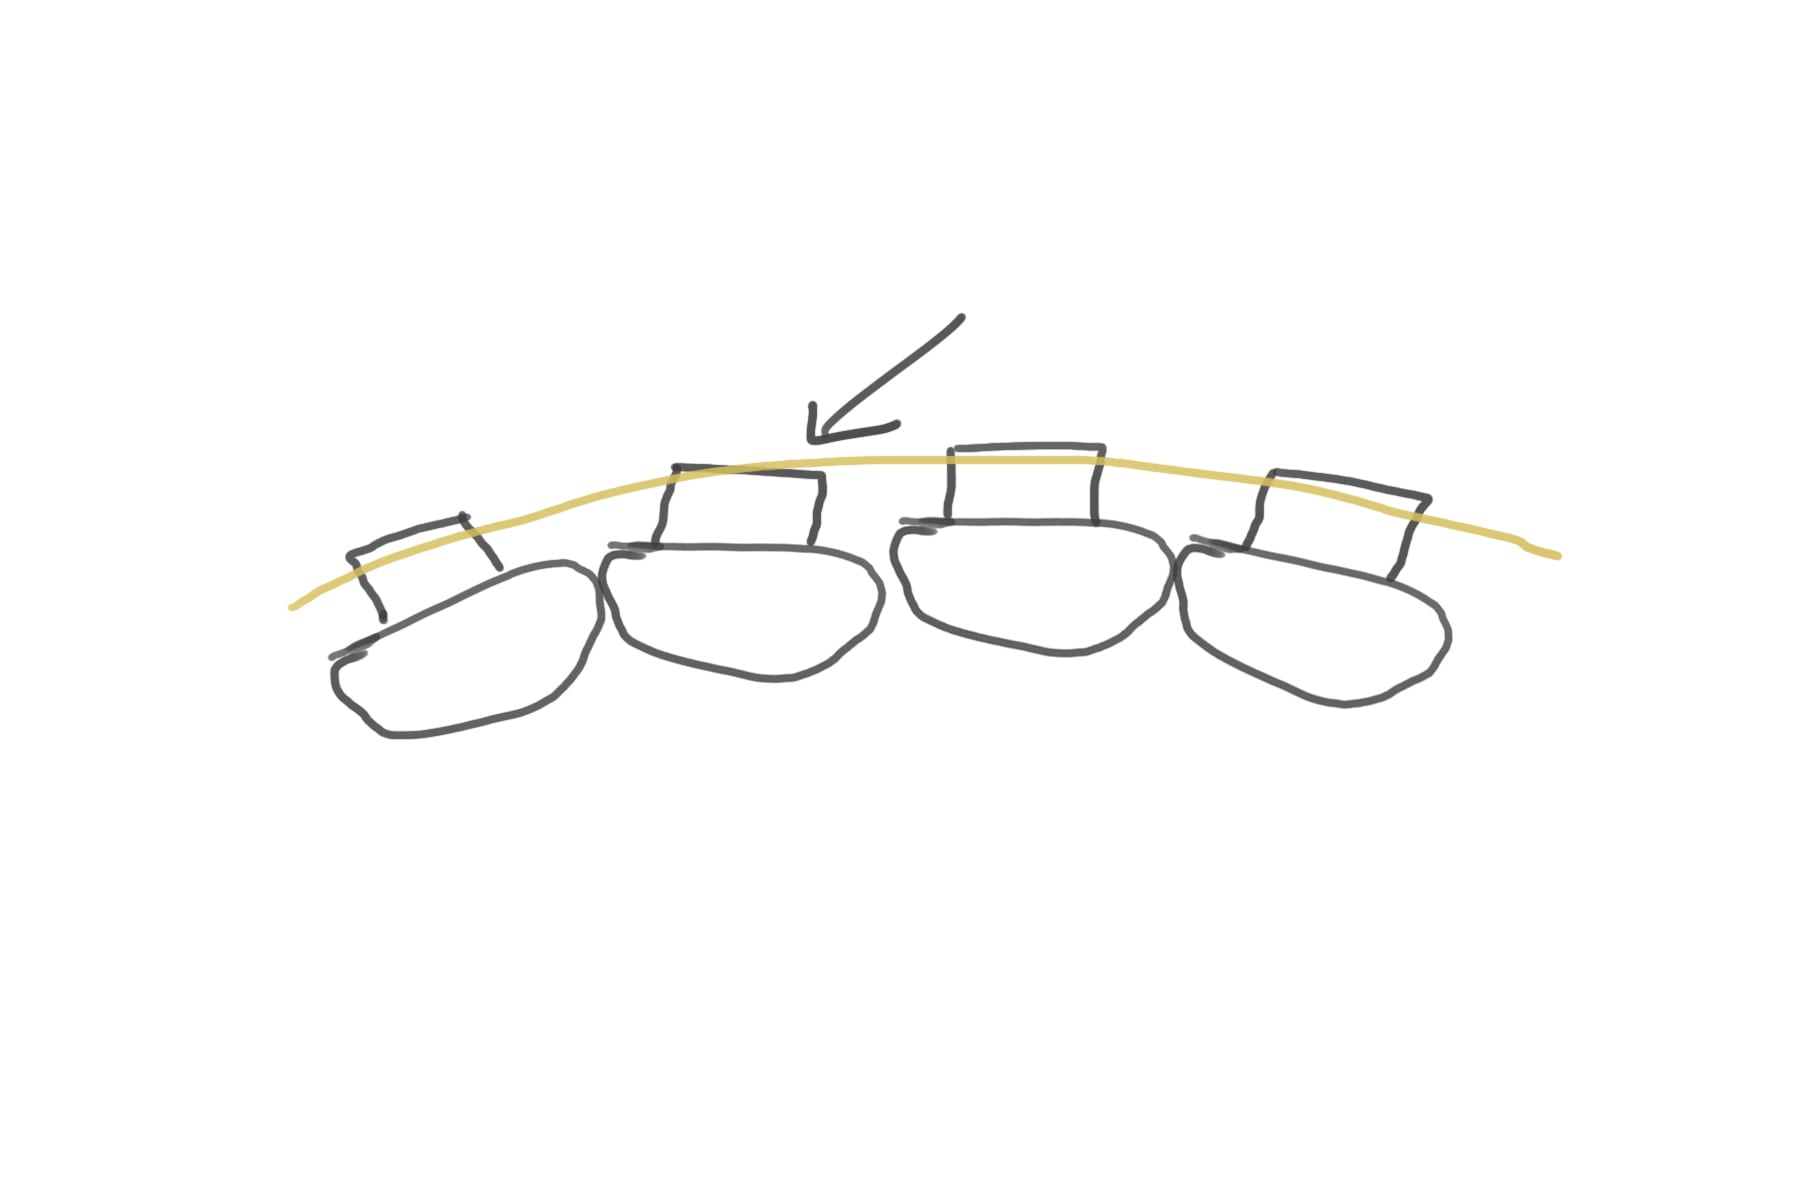 Here, you can see that the lower left 1 is not aligned, but the wire is not tight in the mesial and distal of the bracket.
To correct this, all you need to do is (possibly step back into a thinner wire) then fully engage the wire with a metal quick lig or a figure 8 elastic ligature.
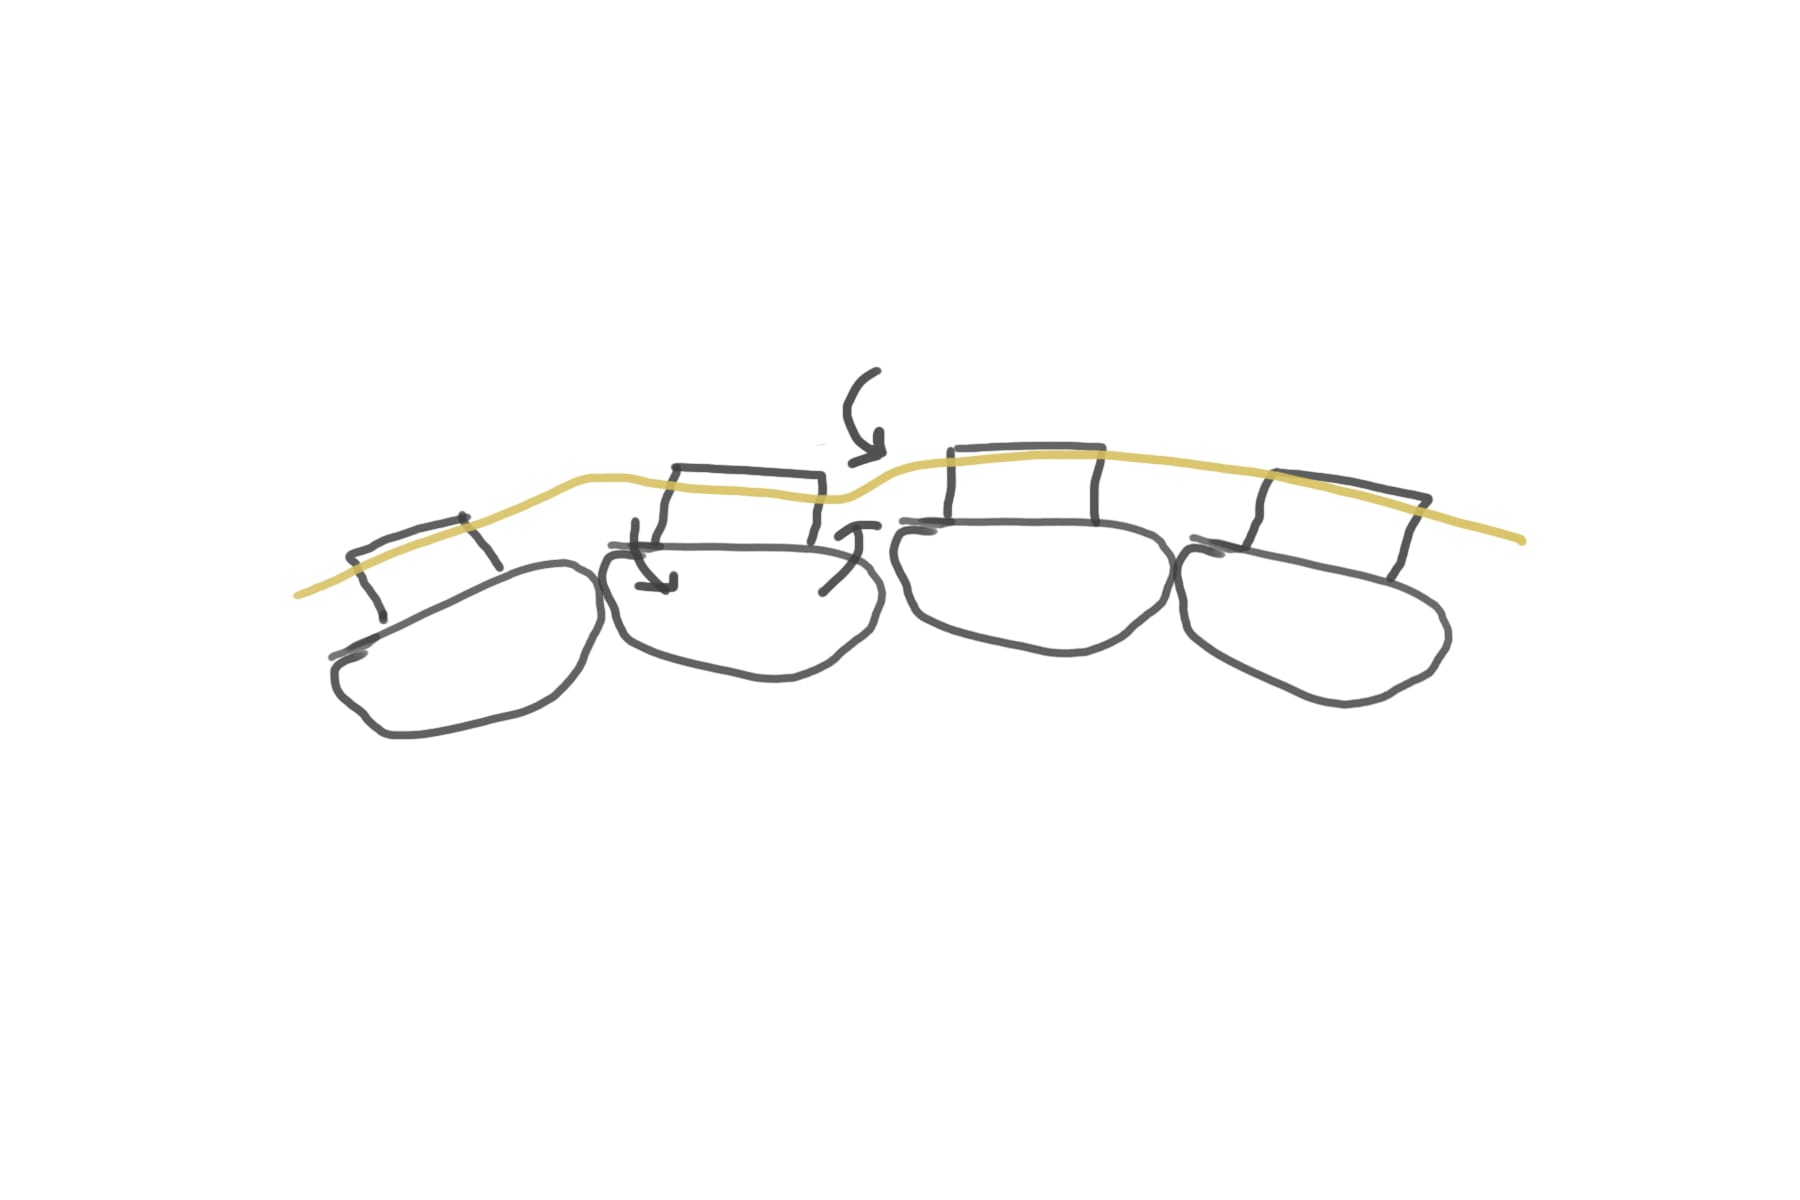
So by doing this, you can see the wire becomes deflected, puts pressure on the tooth, your patient tells you that its tight, and things should start to move and align.
But what if the wire is fully engaged?
So here the wire is fully engaged in the brackets, but the teeth are still not straight, and your patient paid a lot of money and wants it perfect!
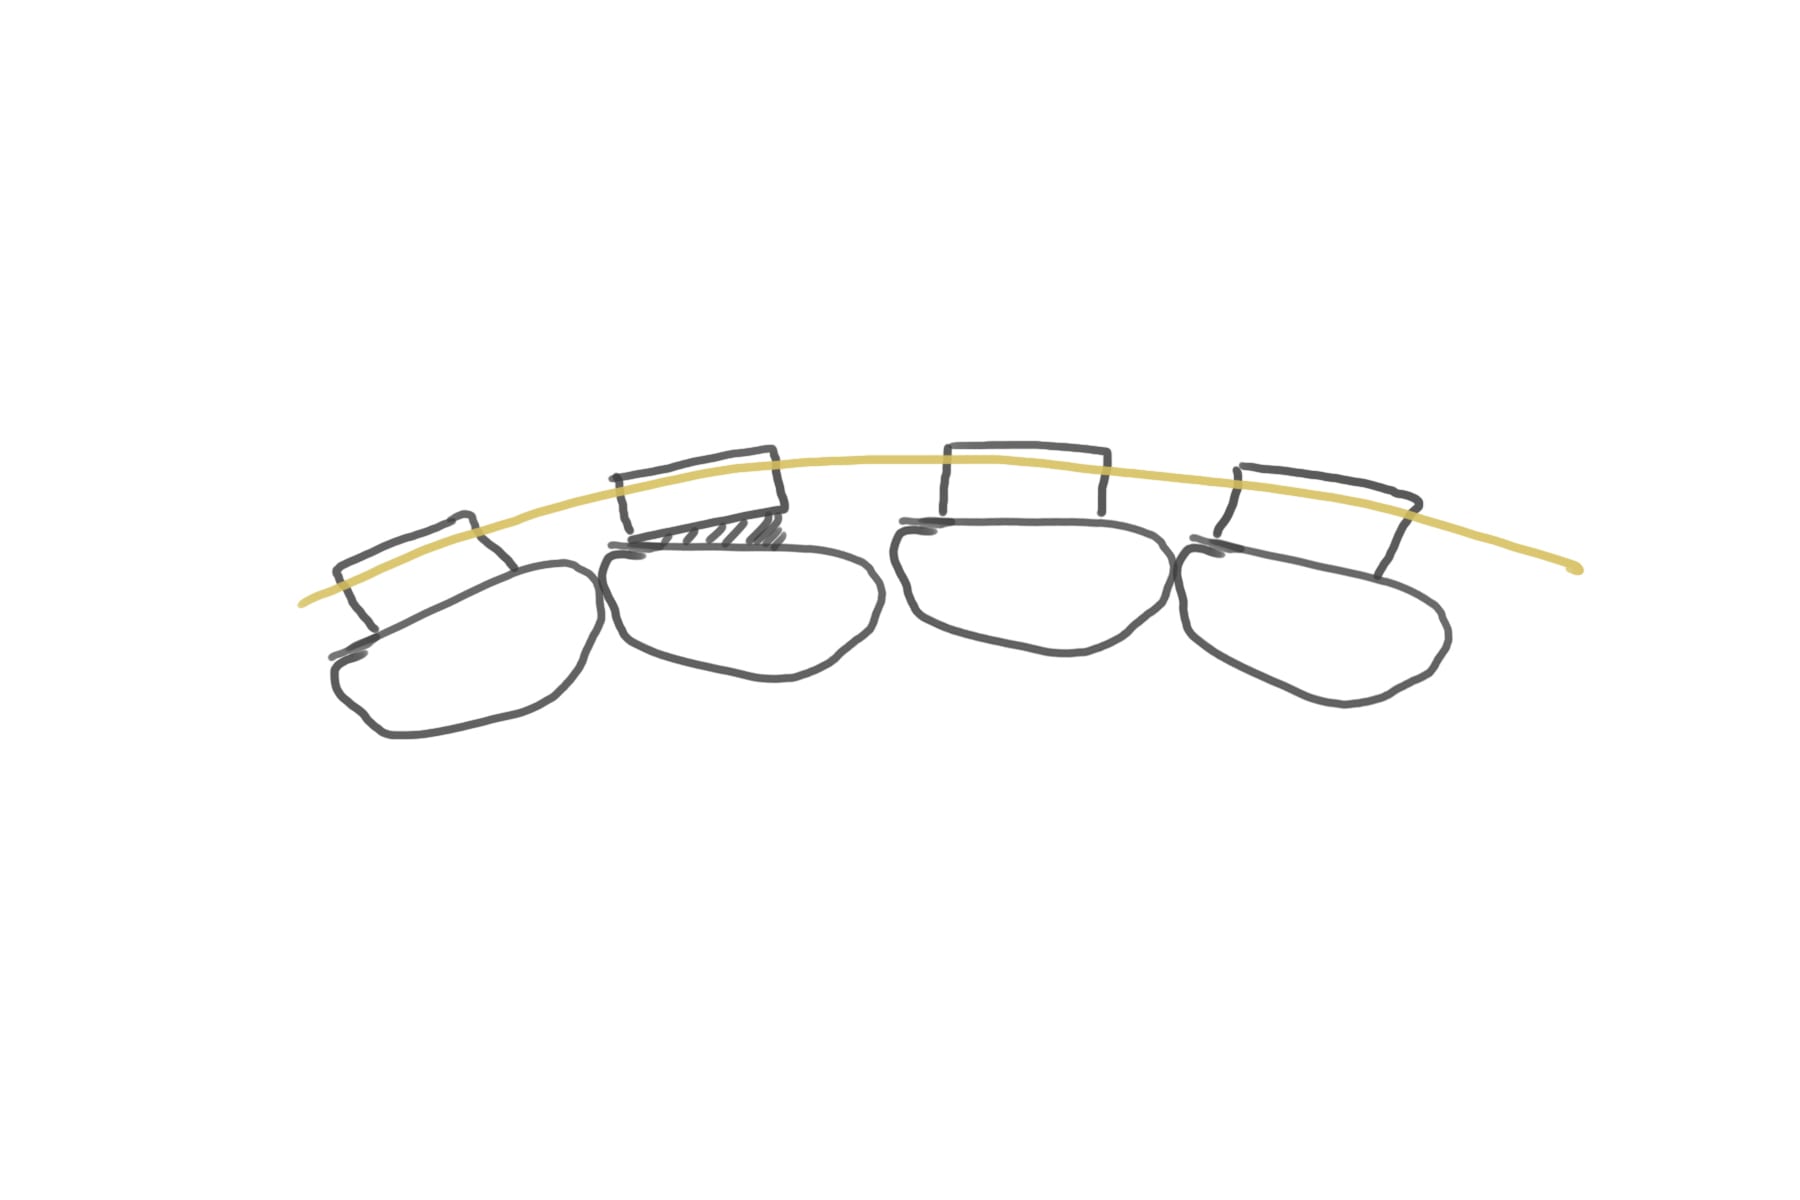 Well, there are two options. But first, let’s find the problem.
There is too much composite on the mesial base of the bracket, so it’s not parallel to the insical edge anymore, and the bracket is more distal to the centre of the tooth.
This could be a bracket placement error, or it could have been the bracket was placed in the best position possible, considering the level of initial crowding.
To fix this, you could take the bracket off and reposition it into a better position. This often gives you a great result, but if you want to make things exciting, you could customise the wire.
Now, this is a lot easier in stainless steel wires… you need to put a bend in the wire, and this confuses a lot of people – so let me try and explain.
You need to think where you want the tooth to go, then bend the wire to that position. So here we want to move the mesial aspect labially, so that’s how we bend the wire
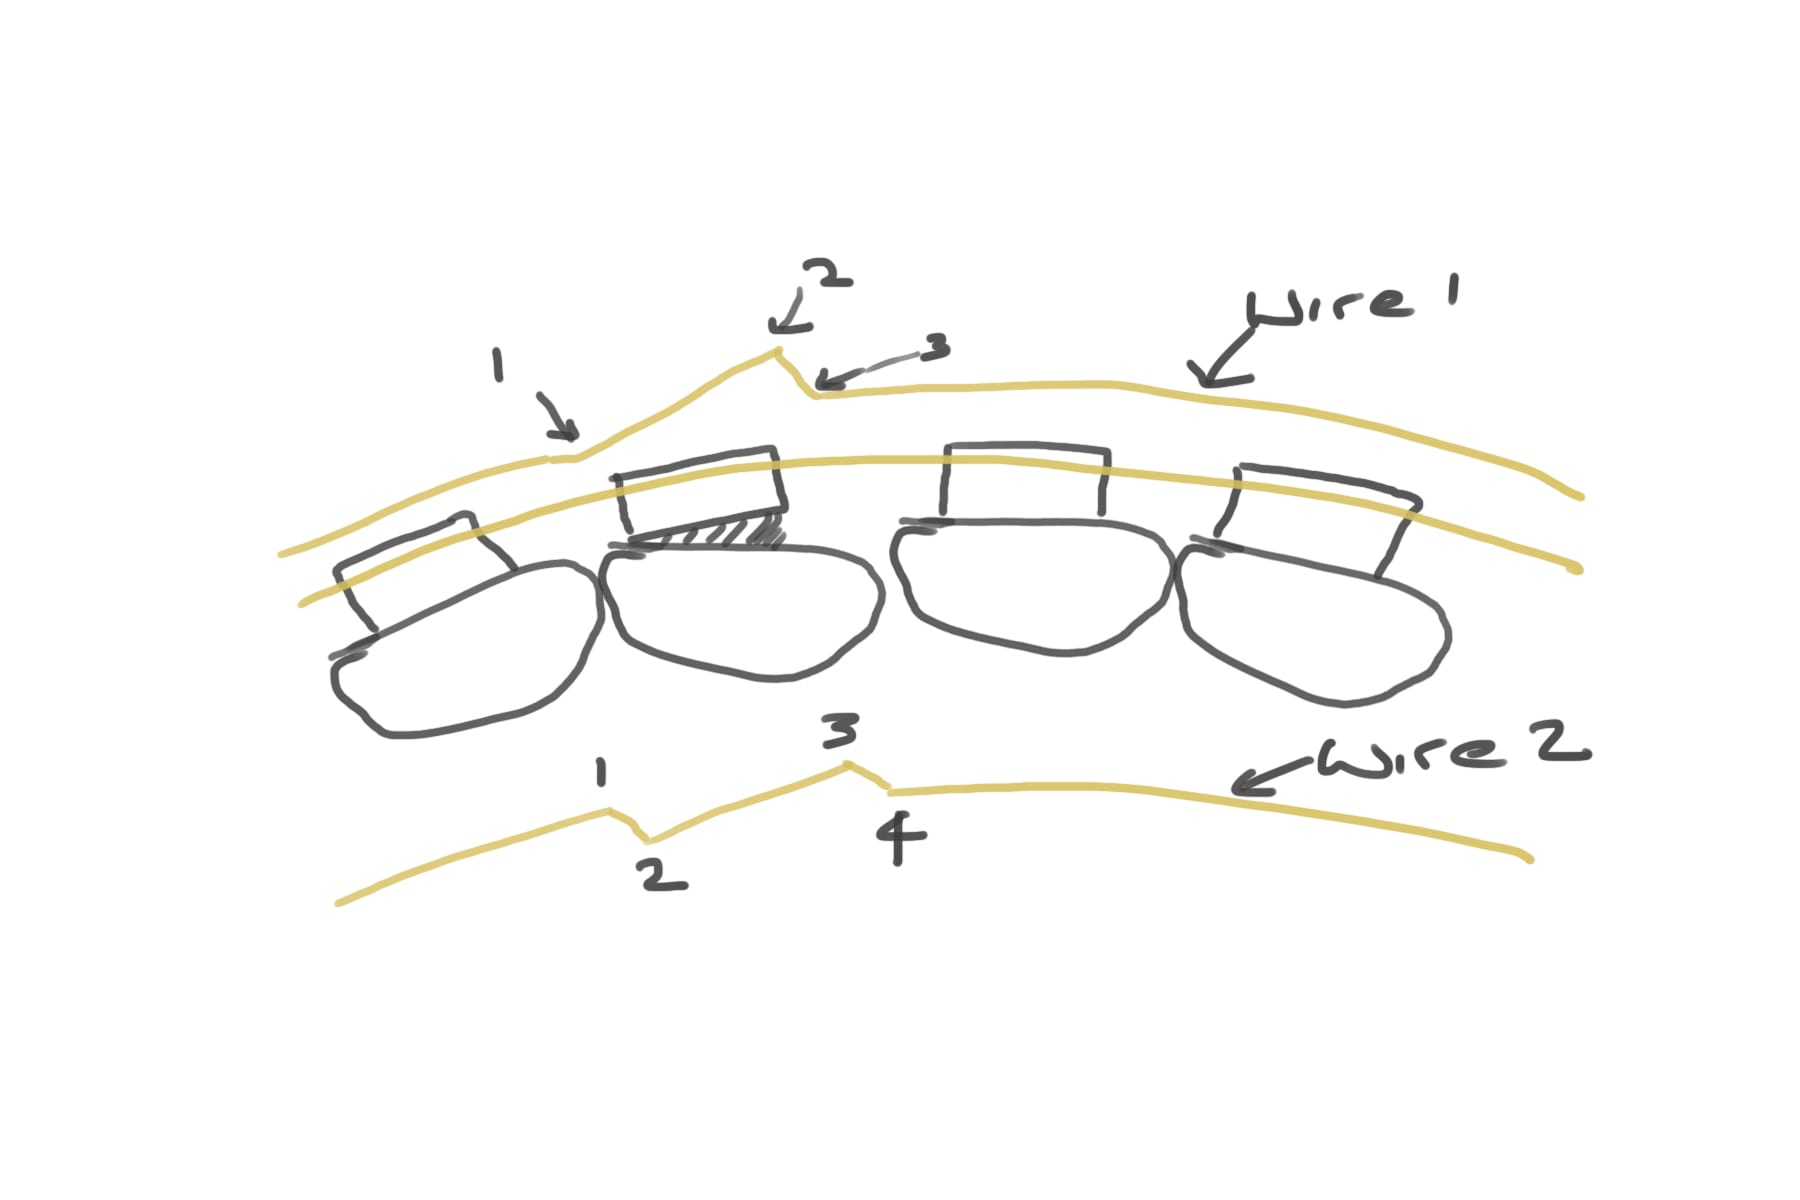 So in the top wire (wire 1), you can see three bends, the section of the wire that fits in the bracket has been bent so the mesial edge of the wire will move more labially than the distal.
In the second diagram (wire 2), the distal will move lingual while the mesial moves labial.
There are all sorts of wire bends possible to move the teeth in any way you want. These are extremely useful when just finishing off a case. In this example, just fixing a rotation in a lower incisor.
Another common application is to adjust the heights of the teeth. Sometimes you need to level gingival margins rather than incisal edges, and your brackets may have been bonded to align incisal edges.
In this case, the wire bend is quite simple. If we just want to move the tooth up or down, you then bend the wire up or down.
Let’s look at this case, here I aligned the incisal edges, but when the patient smiles, the difference in the gingival heights is really obvious, so my options are to rebond a new bracket in a better position or bend the wire.
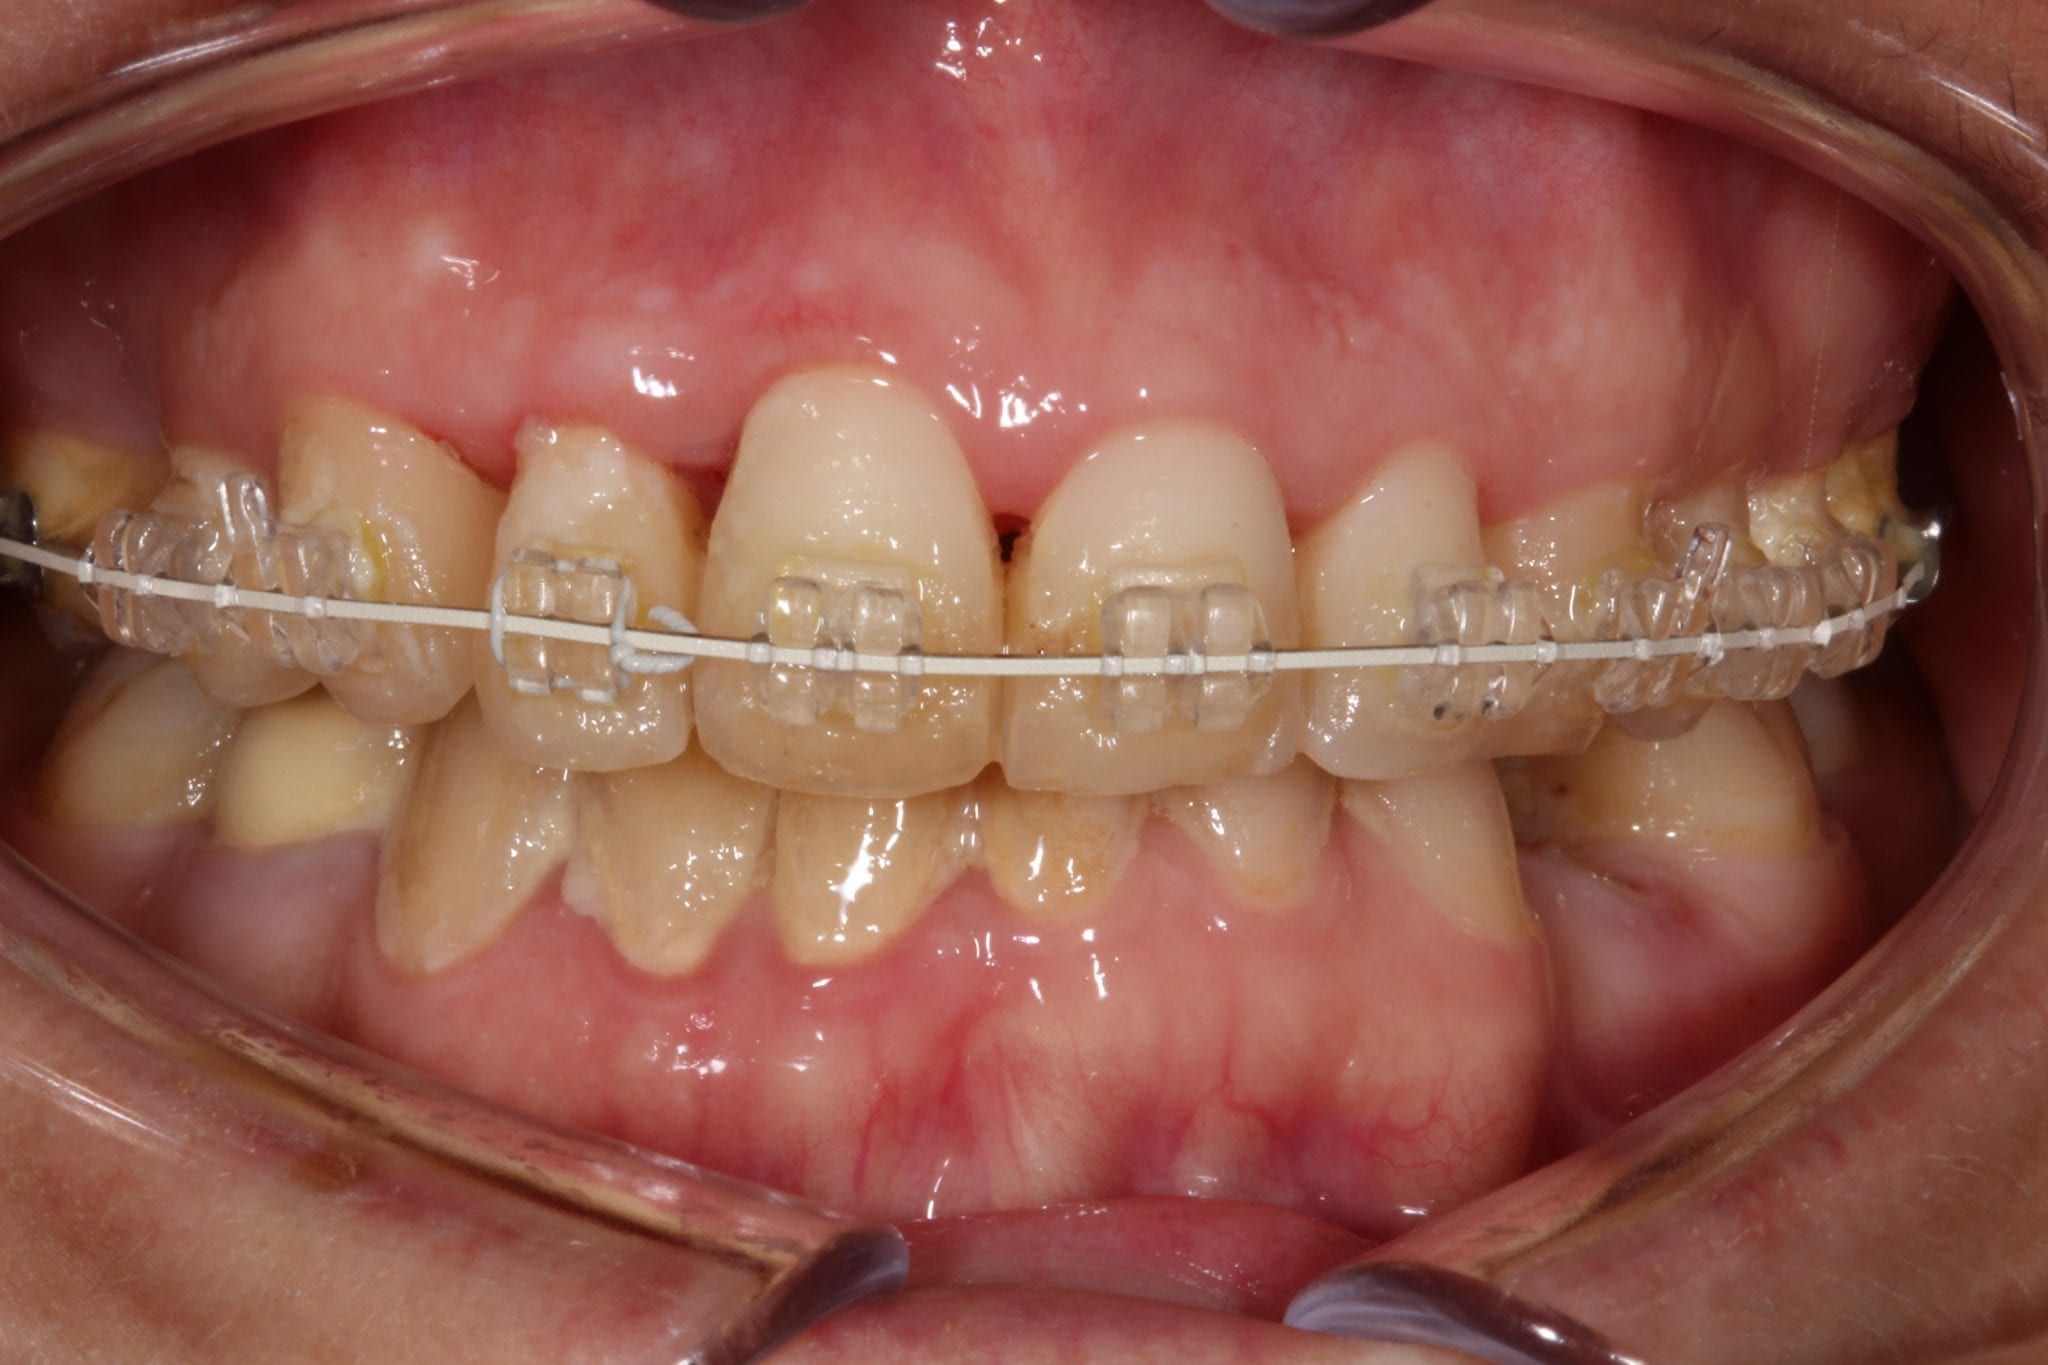
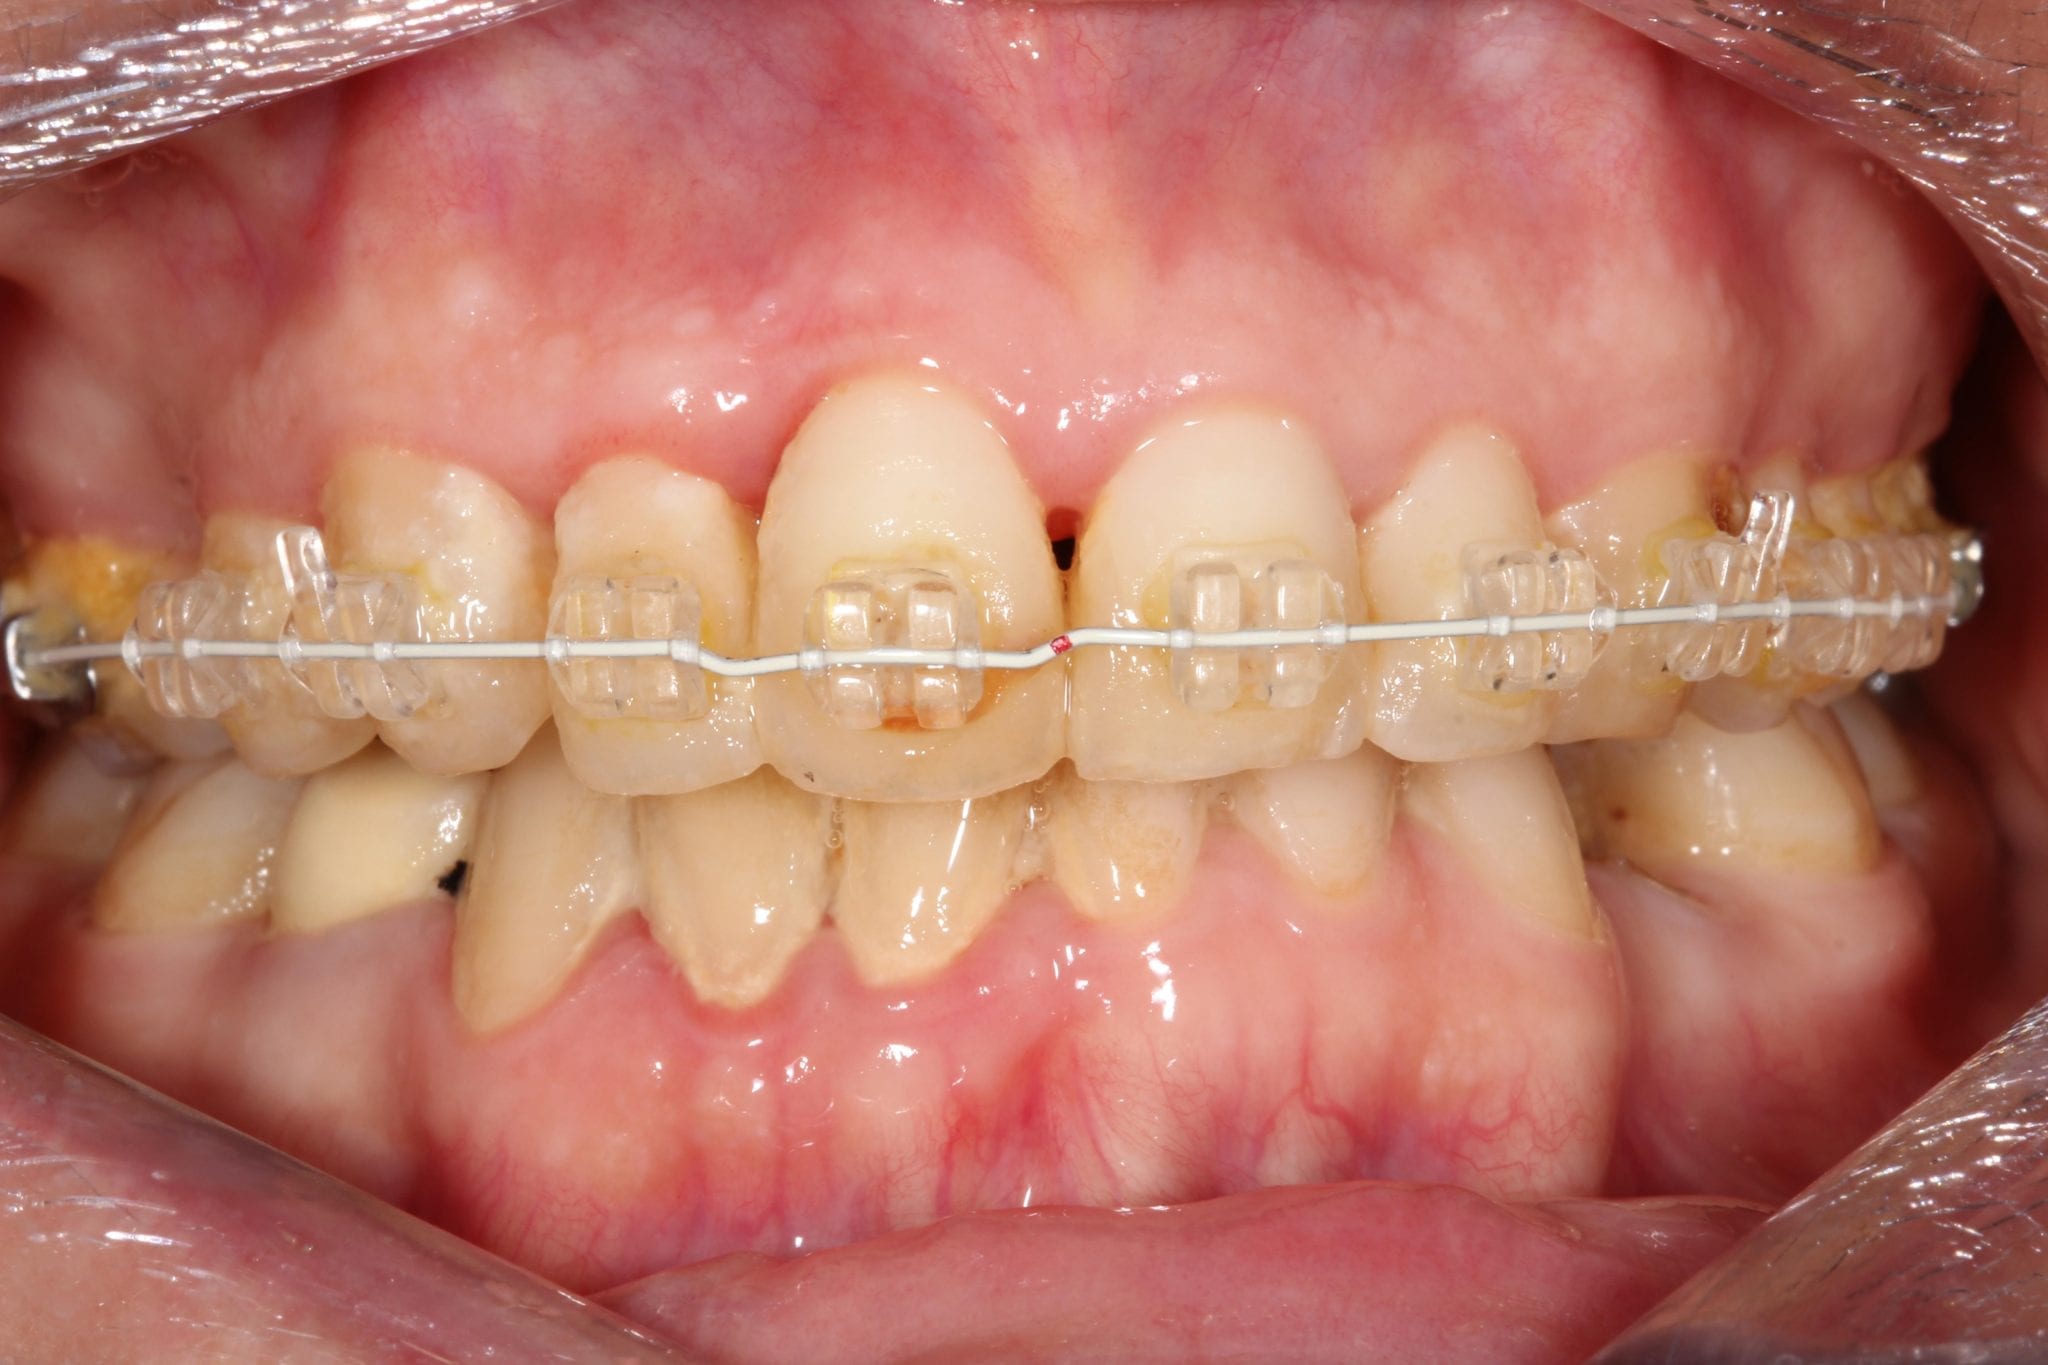
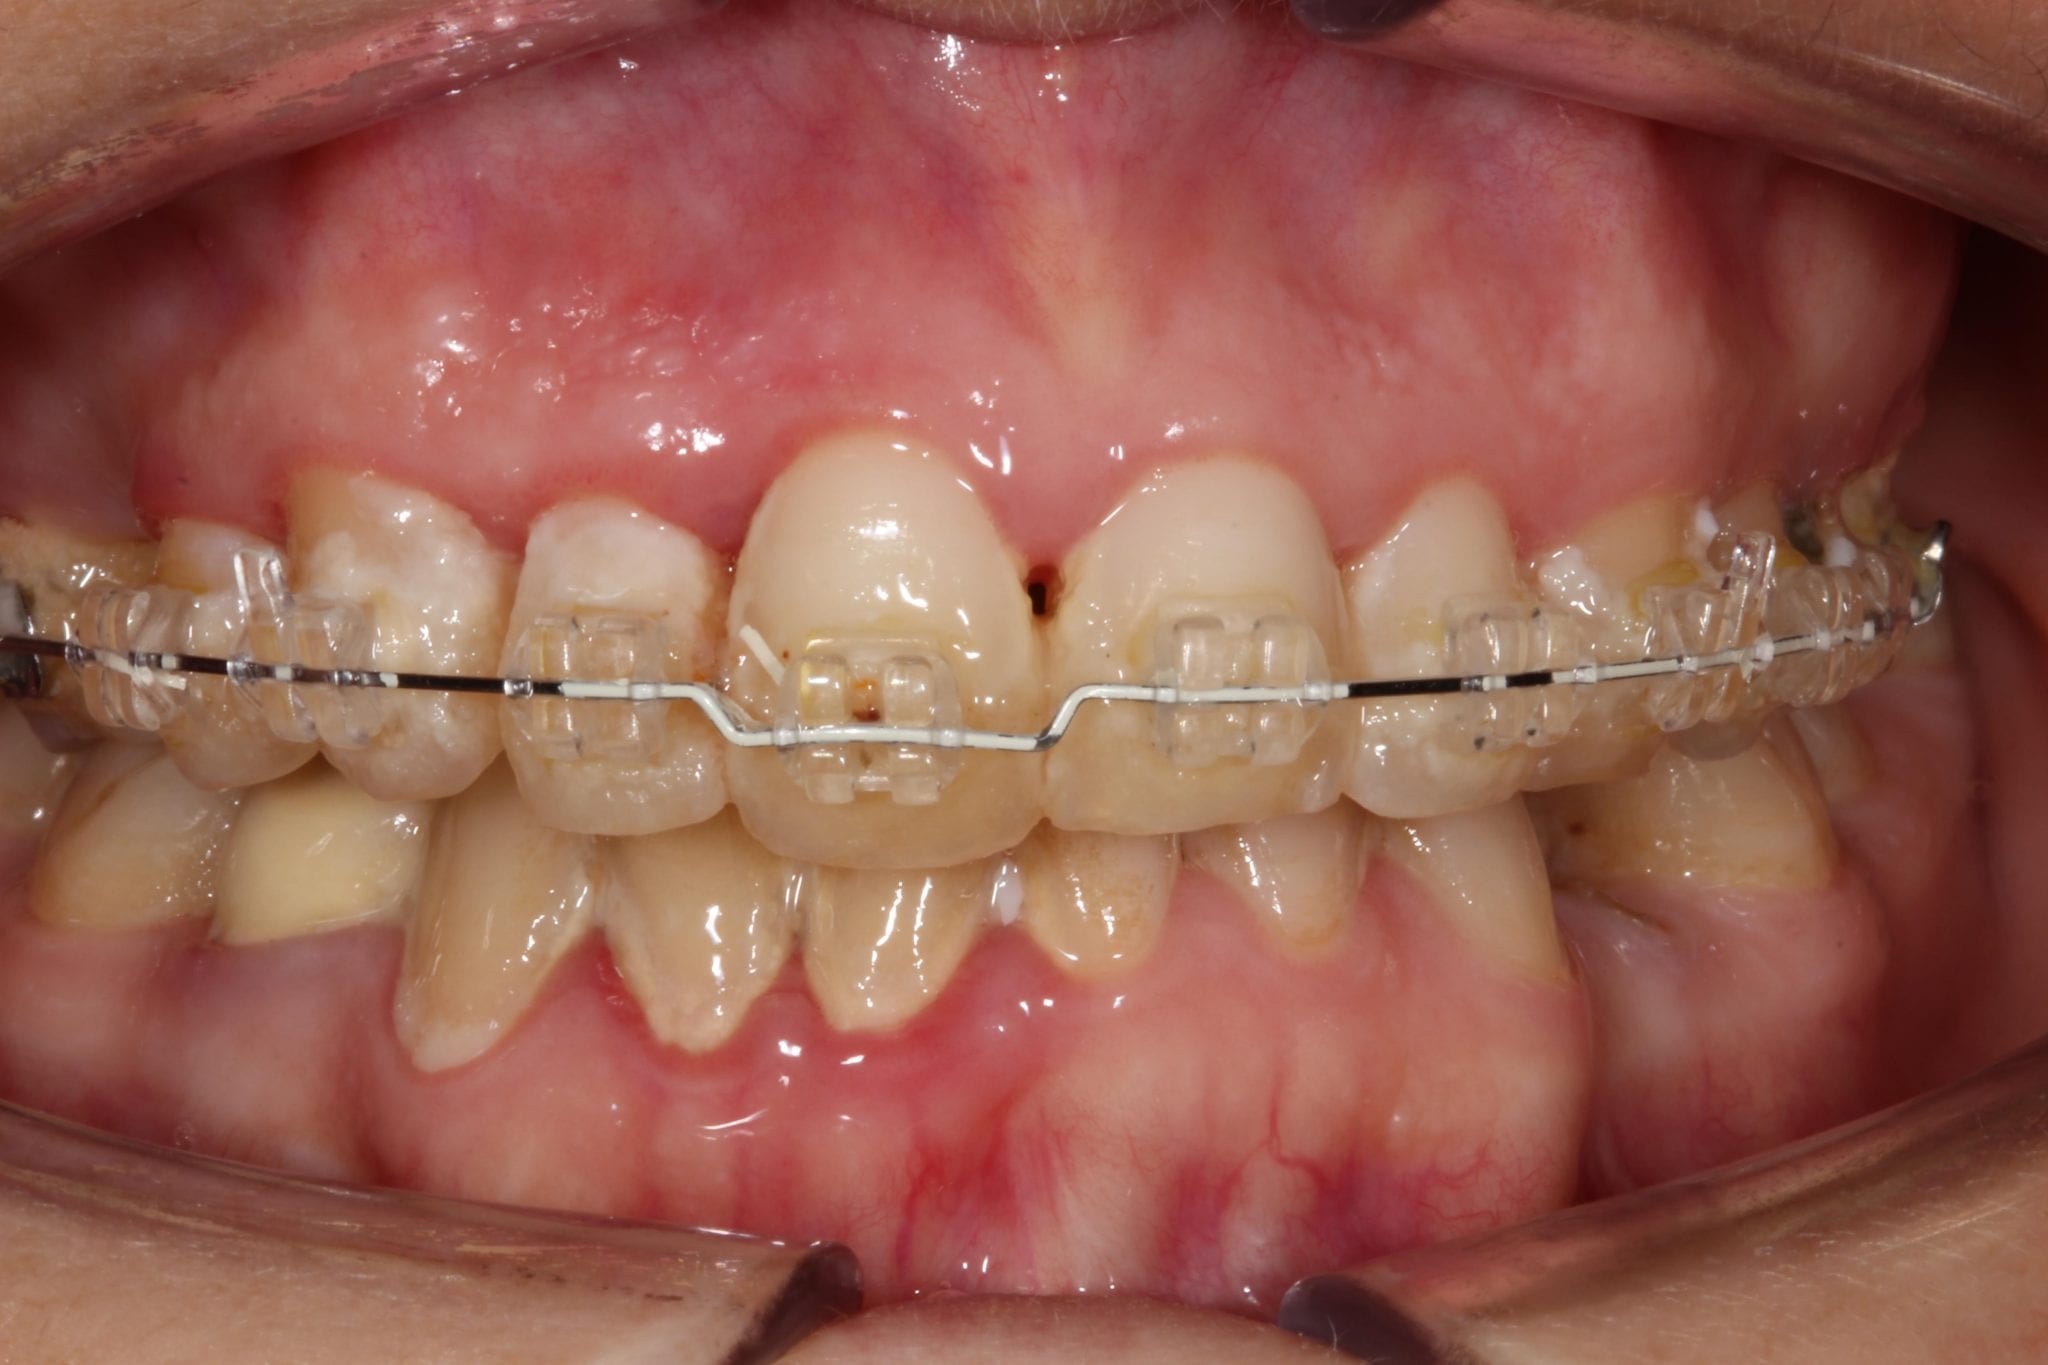
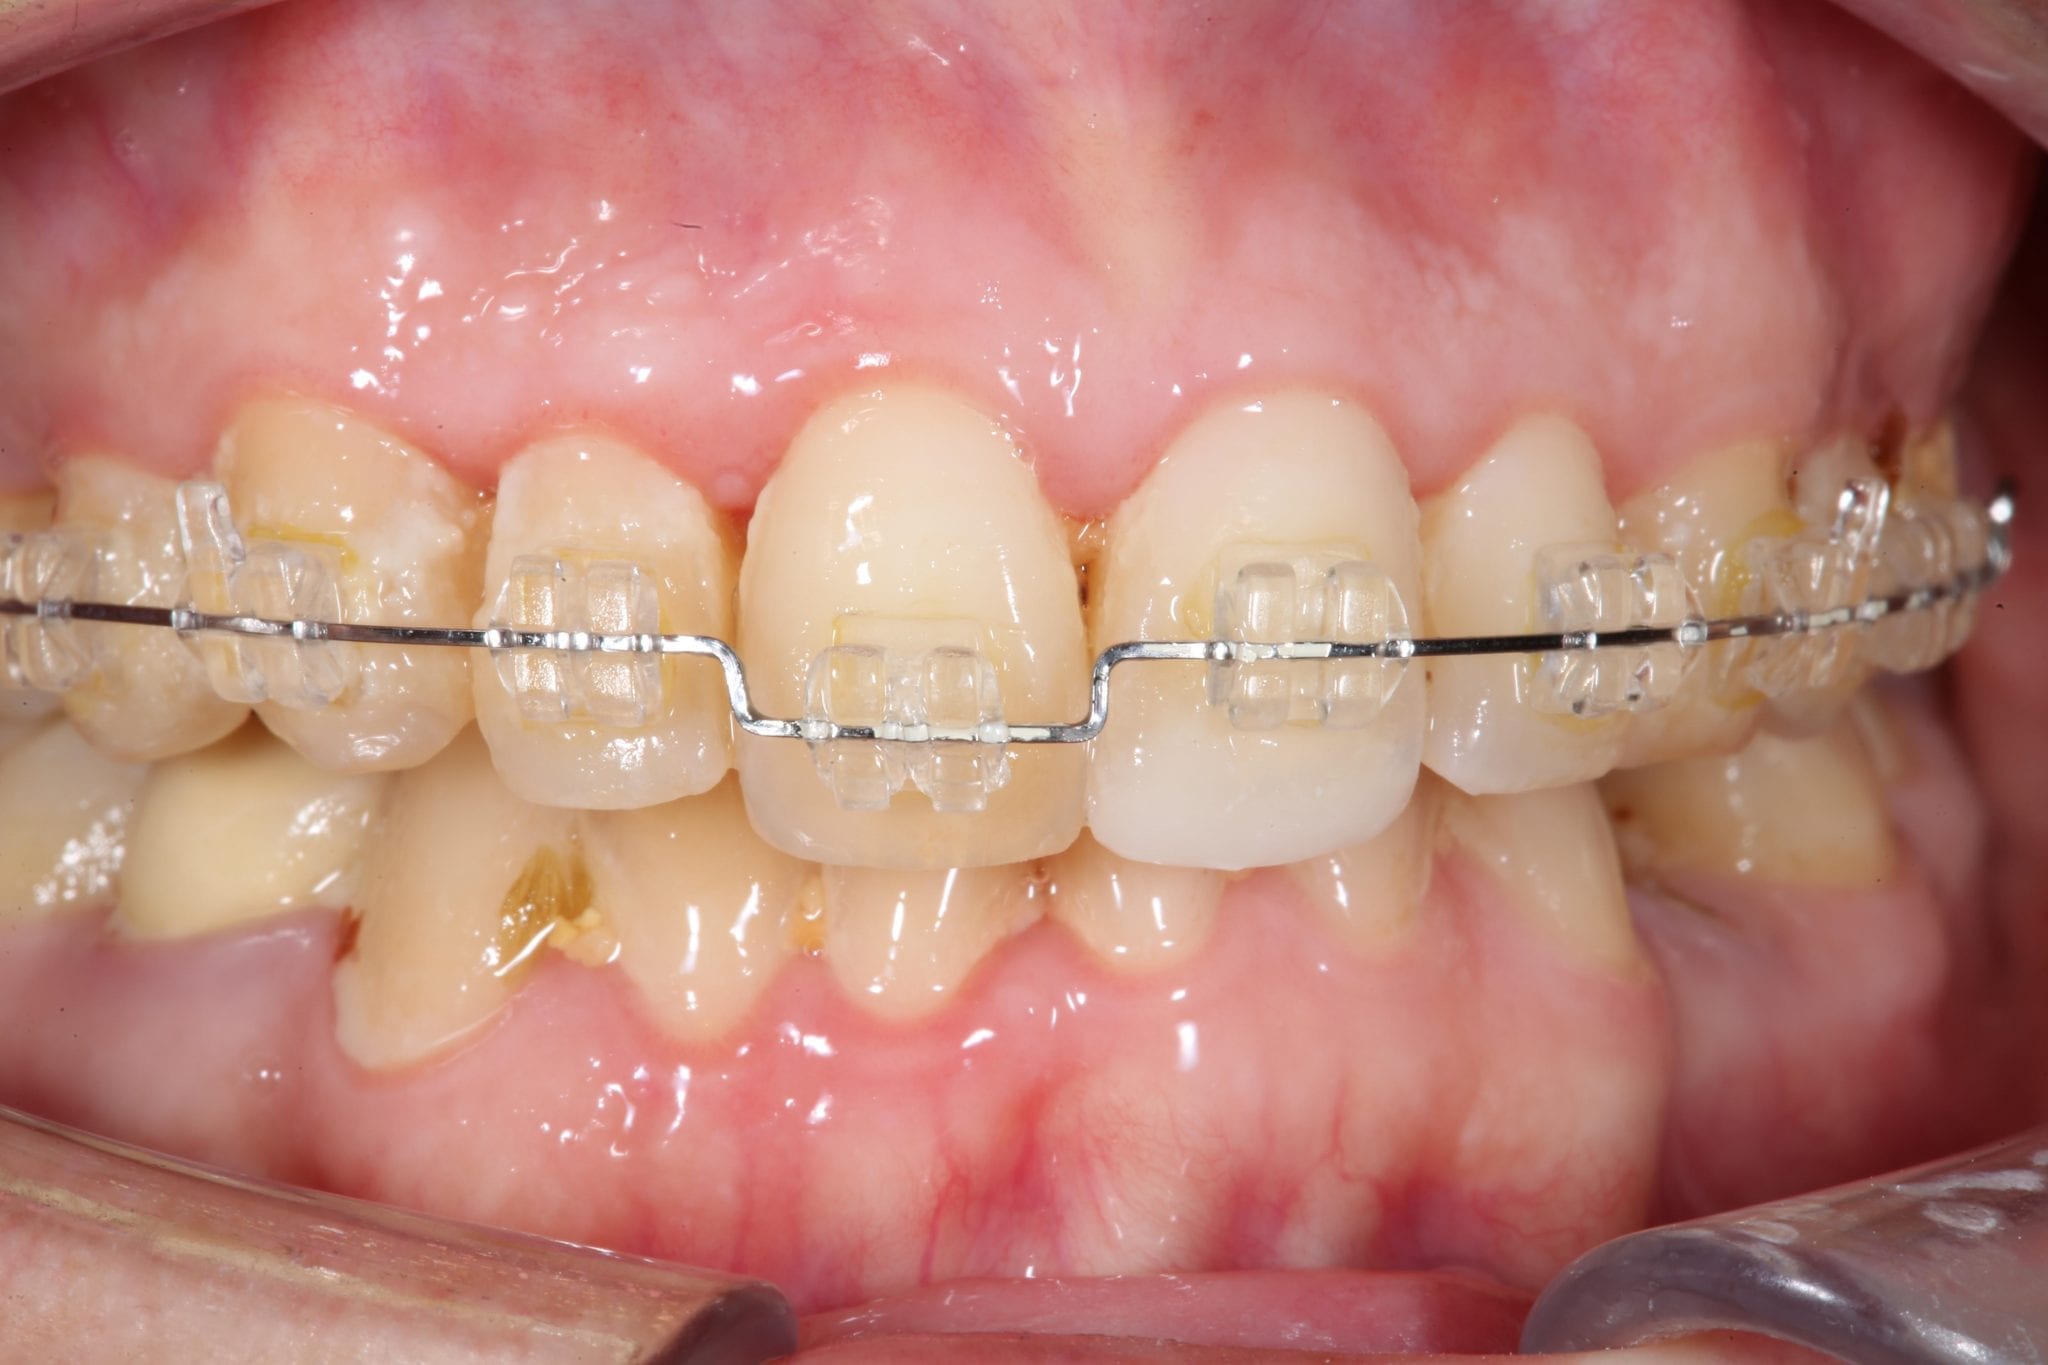
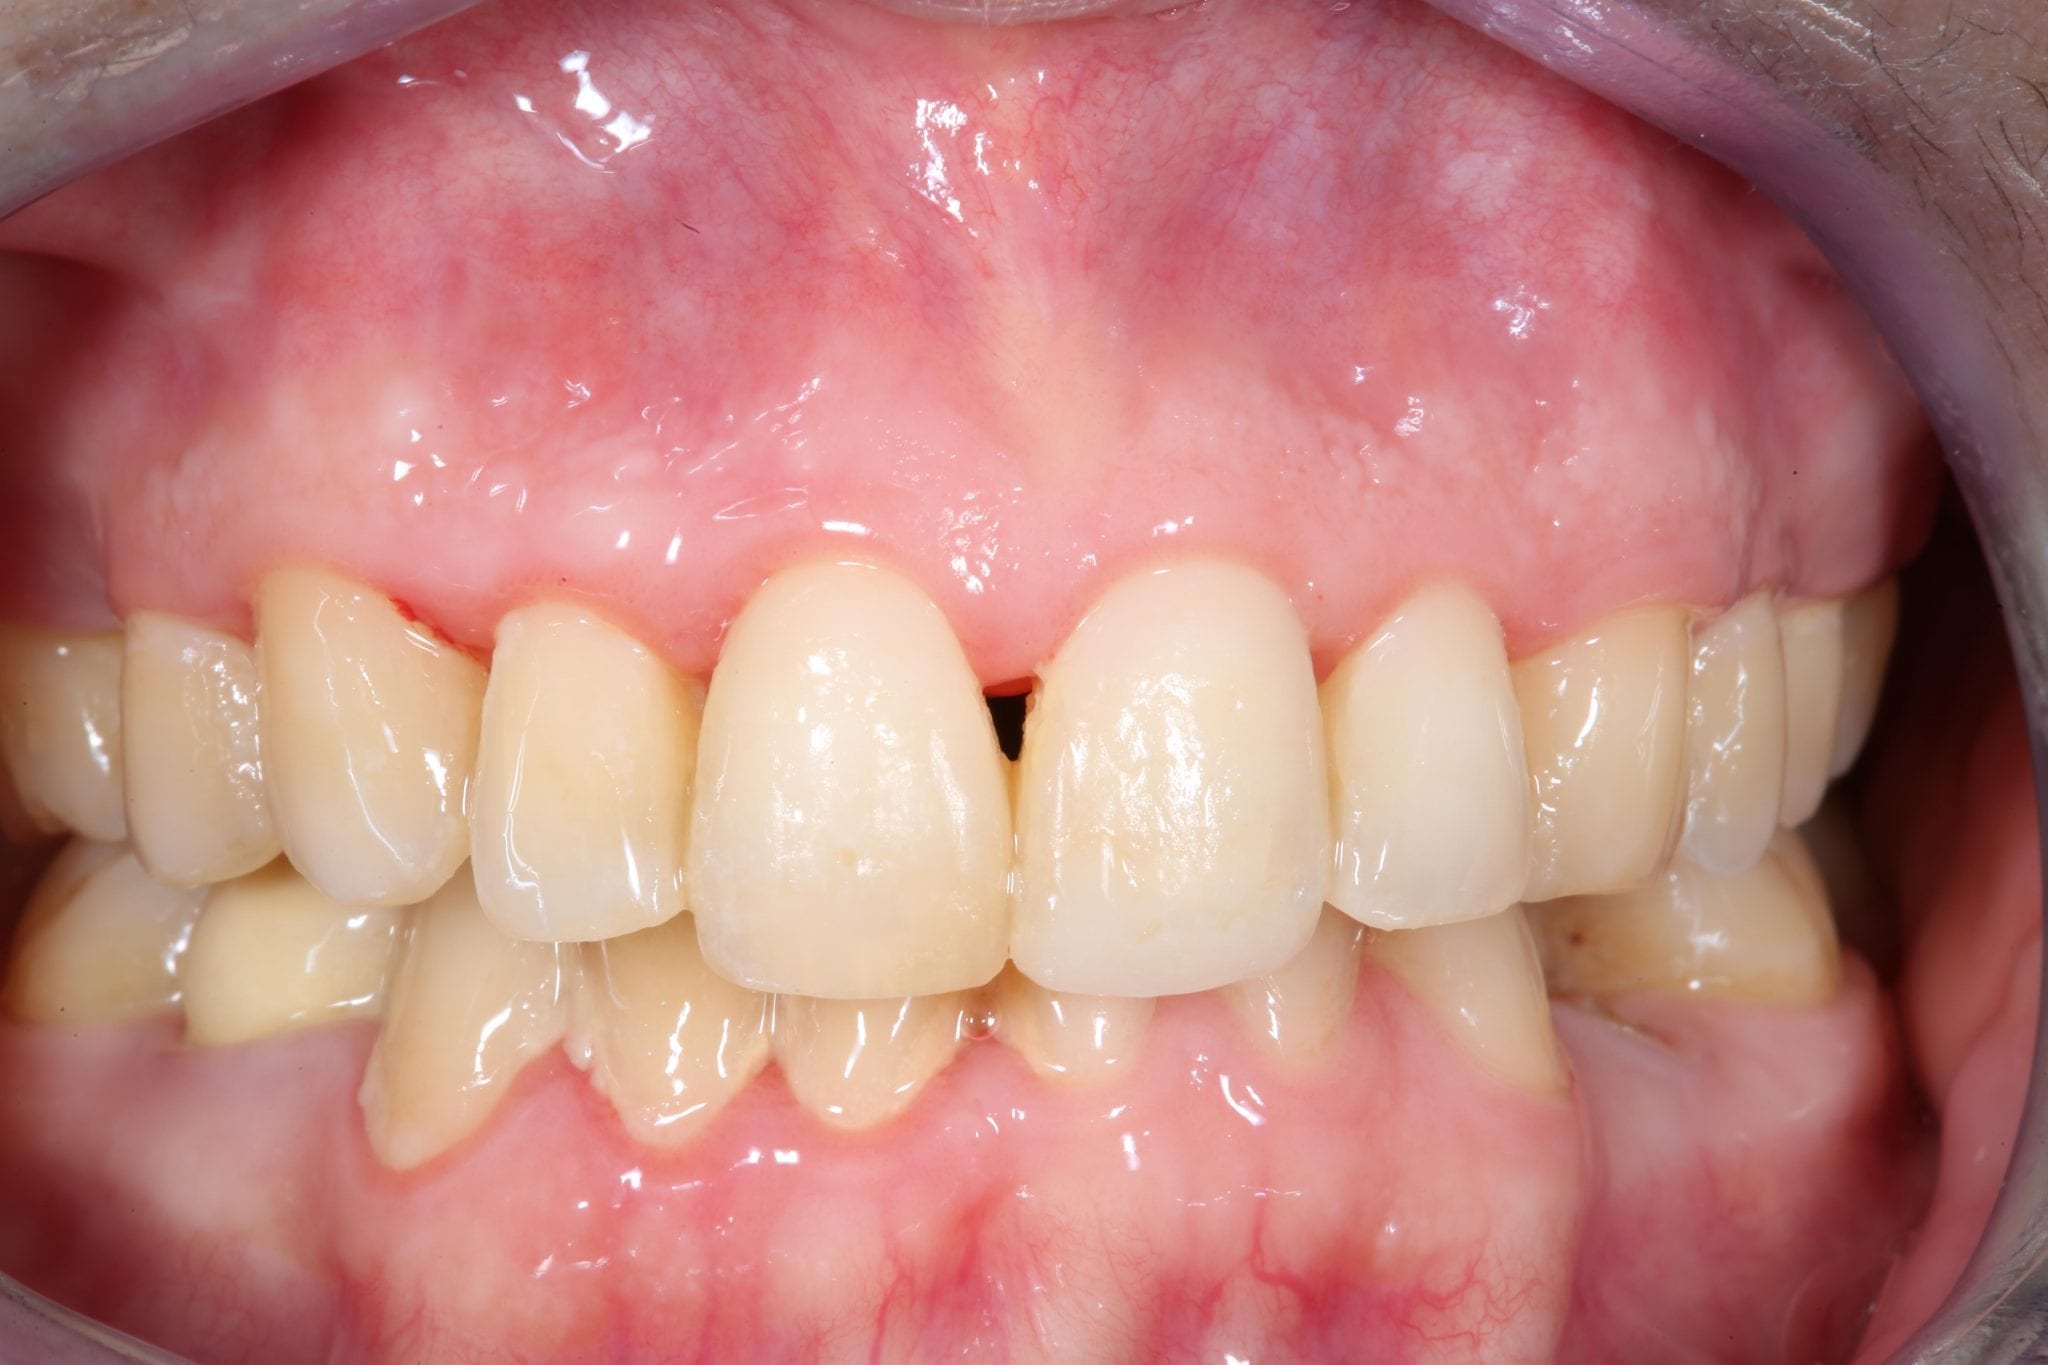
As you can see, I first created a small bend in the wire, move the tooth in a better position, then over time, increased the bend until the gingival margins were better. At this point, its easy to build up an incisal edge in composite, and improve the appearance of the smile as a whole.
Let’s leave wire bending at that – just to keep things simple for now. Remember that the problem is quite often bracket positioning and wire bending is only one solution. These days I will often opt for rebonding a bracket if the correction needed is significant, and bend wires just for minor detailing.
If I was doing the correction above again, I would probably build up the incisor in composite – measuring the length of both of them, then place the bracket in the ideal position.
If you would like to get tips and tricks like this straight to your inbox, then pop your details in the box below, and I will drop you an email whenever I post on my blog. You can also connect with me on Social media, the links for these are below.
Find me on Instagram @dr.sehmi
Get Blog / Cases to your Inbox
If you want to be notified by email when I post a new case, just click the button and fill in the form